I've been making things lately but nothing is totally finished so I can't show it off yet. Except this patch.
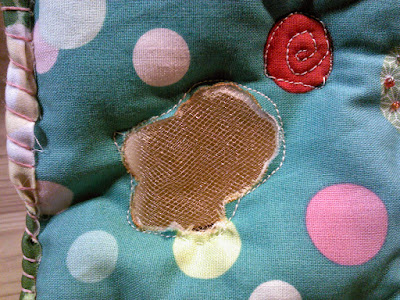
It's just a random one for the monthly swap in one of my swapping groups. I did it puffy style (the "more teesha" style) and I like how it turned out.
I was just obsessed with doing a peek-a-boo window (reverse applique?) type thing.
Peek-a-boo!
Then, right after I made the window (it's to layers of mesh) I wished I had put some beads inside it so they could roll around in there. Next time!
Then I just did a bit of free motion quilting (see that wonky swirl up and to the right of the window).
And some hand embroidery with a sequin. Gotta have some sequins.
I just couldn't let go of having beads on this, so I had to add them, too. (I tried to see if I could sew them to the mesh but it just didn't work for me so I scrapped that idea. . .but I still want to do them trapped in the mesh so they can slide around).
And the back. I wanted a bright fabric so it would make the border pop. Mission accomplished.
All the fabric was just random scraps so I think this patch was truly in the spirit of Teesha Moore patches. (hee hee, the double circle free motion quilting kind of looks like a butt!)
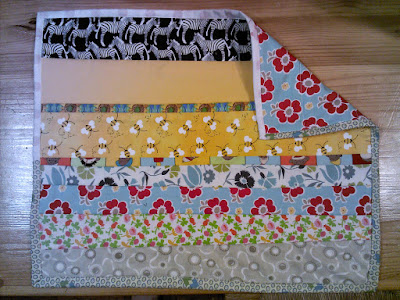
In Randomness news, I also made a practice quilt. Ok, quilt-let? (maybe the word "placemat" is more accurate, but I made it as a practice quilt so I'm using the word quilt even if the finished project is really small).
I'll be making a lap sized quilt for a swap (using the quilt as you go tutorial from Missouri Quilt Co's youtube channel) but since I'm still a fairly raw beginner at doing a full quilt (I've only ever made one small wall hanging one) I wanted to get the feel of all the processes before I started out on the big quilt (it's not huge, but it is decent sized at 36x48).
So I raided my scraps for the strips and got a FQ-ish sized piece of fabric for the back and just made a little sampler. Doing the assembly was easy since it is quilt as you go (so you have the backing, pad, and top together the whole time). The binding wasn't bad, either. I think the messiness I encountered when attaching it (I didn't quite keep "in the ditch" in some spots!) is due to the shape not being even. Since I was doing this as a practice, I wasn't super careful or concerned about the edges being absolutely straight which made the binding get a little wonky along the way. That and I got one of the corners goofy (need to look at a few tutorials to freshen my mind about how to do the mitre. . .I understand it but when I go to execute it I always want to do something backwards. . .same with joining strips to make one long strip, I ALWAYS do it wrong the first time, ALWAYS).
So, I made a little practice quilt-let which is now something for my cats to sit on. I put it on the floor for them and they both had to put their holes right on it. That is a sign that they approve, putting their hole on something (yes, that includes putting their hole on YOU).
Now I need to make the real quilt (fabric strips are already prepped and I'm waiting for my batting to arrive since I thought I had the right size only to find out I didn't *headdesk*) and I'm working on a few other swaps.
Next up on the blog? Fabric review!


No comments:
Post a Comment