Friday, September 28, 2012

Double Dipping: Making cloth bags!

Remember the post about the Green Bag Flash Mob?

Well, I just found a GREAT way to double dip.  To make bags for the Flash Mob and for another charity:


The Pittsburgh Tote Bag Project collects bags for use by local food pantries.  So they give out the donations in a reusable bag to help reduce plastic bag consumption (and spread the word about using cloth bags instead).

How fabulous is THAT. 

The best part is, there is no requirement for the bag (don't have to use a particular pattern) so I can use the Green Bag Lady pattern (which I like a lot and am familiar with) and whip out bags easy as pie.

I also found the Satchels of Caring Foundation.  I requested more info from them because they do have their own pattern they like used.  I really prefer to be able to just make bags and give them and not have to volunteer in person, so I need to know if that's an option as well.  The only thing I don't care for about this charity is their affiliation with Susan G Komen.  I'm not a fan of The Pink Monster, but I could overlook it if Satchels of Caring fits my other requirements (easy pattern, don't have to volunteer in person, etc).

But for now I'm totally going with Pittsburgh Tote Bag Project since I can donate on my time (and anonymously) by just dropping the bags off at the Food Co-Op or Construction Junction (there are other places, too).

I love being able to double dip projects.

I'm so happy I picked up that remnant when I was out shopping.  I got it just to make a bag (or bags) but didn't really NEED it for a bag of my own.  Now I can put it to good use.


Tuesday, September 25, 2012

October Overhaul!

It's time to get serious about organizing and cleaning up my craft supply hoard.

I've had it on my "to do" list for a while and even announced to the wife that I need a shelf (to display my finished items).  So since I need a shelf then I need the input of the wife so he can figure out where we'll put the shelf and what kind of shelf and where to buy the shelf. . .yeah, all that shelf talk turned into a huge excuse not to get any real organizing done.

BUT NO MORE.

Last night the wife got a bug up his rump and started tidying not only his side of our dining room table (where the majority of my fabric hoard resides) but also did some organizing in the computer/craft room.

This is a very good thing.

Then Pinkapotamus started an October Overhaul and. . .well. . .it's like the stars are aligning and it's now truly time to get my mess straightened up.

But I do have to amend the lone rule for the October Overhaul.  The lone rule is NO BUYING Oct 1 through Oct 31.  But I have a few projects I have already planned to buy for so I'm making a list of approved purchases that can be made during the "no buying" time line.

Approved Purchases:

1.  Wool blend felt.  I need halloween based colors to make part of a gift for a halloween exchange I signed up for.  So I'm allowing ONE wool blend felt purchase from Wool Felt Central.  (but no adding in any other items--ONLY felt is allowed)

2.  Happy Drawing II fabric set.  This set isn't out yet (and comes out in October).  I'm using both Happy Drawing collections to make a quilt, so the minute Happy Drawing II comes out I plan to buy the yardage I want (of the prints I want) so I make sure I don't miss out on it.  I already have all the yardage planned (per print).  I plan to buy from Hawthorne Threads.  (again, no adding anything else to that order--ONLY Happy Drawing II fabric allowed).

3.  Halloween themed ribbon/notions.  I do need some halloween ribbon for the aforementioned halloween exchange project.  I don't have any halloween themed ribbon in my stash and I need some to re-do an altoid tin (see, I know what I want to do with it).  So I am allowing for a ribbon purchase during the "no buying" time frame. 

And that's IT.

Those three purchases are the only ones allowed.  I'm going to try and do the buying for #1 and #3 this week (before the buying ban goes into effect) but I can't guarantee it will happen.

So, now that I've written down my few allowances, I'm officially joining the OCTOBER OVERHAUL!!

Monday, September 24, 2012

GIVEAWAY: Pin it to Win it

Now I don't pimp giveaways and such here often but this one is fun and relatively easy (for all involved) and is very "scratch my back, I'll scratch yours" so. . .

I'm trying to win a fat quarter bundle at Freshly Squeezed.  I need any and everyone (minimum 12 folks) to re-pin one of my pics on pinterest.

DETAILS:

Freshly Squeezed is having a Pin it to Win it Contest (details HERE).

Summary:

--pick one of their Fat Quarter Bundles and pin the pic.
--get folks to re-pin your image and you WIN IT.  (need to get the same amount of pins as the sale price:  example:  the bundle I want is $12 so I need 12 folks to re-pin).
--Runs from 9/24 - 9/27 (full details on how to claim prize, etc are at the link)

I just need you to repin this:

Source: etsy.com via Jenny on Pinterest


Like I said, I only need 12 folks to help out (well, only 11 now, I already have one re-pin).

And so you don't think I'm being greedy, leave a comment if you re-pinned and I'll help you out with any contest you are currently in (this one or another--as long as no purchase is required).  Just leave a link to what you want me to vote for, re-pin, or re-tweet and I'll do it for you.

AND. . .if I win I'll share the wealth.  I'll have a giveaway here sharing either something I made from the bundle or something from my stash or. . .I'm not sure but I'll definitely celebrate the win.

Thanks for looking at this post and helping me out.

Good luck to everyone who joins!

New projects

This weekend I started two new projects.  I probably should have worked on the giant squid a bit, but after talking with the buyer there's no super rush on the squid (the buyer needs to gather up the funds to finish paying, so my casual sewing pace is perfect for them).

Since I had nothing else started, that meant I was free to begin whatever I wanted.

Oh yeah.


First up is the postcard cake slice I want to make (and then send) to my mother.  Her birthday is in October, so I have a nice bit of time to get this first one done (which will be a practice one--I can already see it's not good enough to give as a gift) and then make a better one to actually send.

So far, so good with this project.  But I think I want to try it with square sponges versus the rounded side ones I got.  I think they'll cut better.  And I think it might be better to cut the sponge with my exacto knife versus my bread knife.  I cut the frosting ditch with my exacto and it went very smoothly versus the bread knife which pulled and snagged a bit.  I also need to get some real cardboard.  Once I saw my cut on the sponge was messy, I knew this would be a practice card so I just used some cardboard from a beer case!  I will definitely want nicer cardboard for future cards.

While I was waiting for the spray paint to dry on the sponge, I started my next sewing project.


A scrap map of the USA!

West coast represent!  I would have gotten more done but I didn't have any scraps picked out for the next states (Idaho, Nevada, and. . .hmm, is that New Mexico?  I think it is, and Arizona is next to it--I get them confused).

I do have Utah picked out but I can't jump around.  I want everything to fit well.

You can't see it very well on this pic but Alaska is done (white snowflake print).  I got Hawaii a bit closer to Texas than I planned but I think everything will be ok in the end.

I have a lot of the states already selected but I need MORE scraps.  I have some charms (from a few swaps I joined) which will be arriving soon so maybe they'll give me more to work with.

See, it's not that I don't have FABRIC, I just don't have actual scrap right now.  And I hate to cut into a fat quarter (or big piece) just to get a little scrap. 

BUT. . .maybe this project means I "need" to buy a few new scrap packs?  There are a few (at different shops) that I've had my eye on.  But I think it will be more fun to wait for the charms I have coming and then to wait and make some more projects (and make my own scrap) and work on this map slowly.

So the map will be a long work in progress, which I like.

Now, I need to go buy some more Rockford Red Heel socks.  I have one more pair of sock monkeys I need to make (for a commission).

Shared at:

from blank pages... linky party

Friday, September 21, 2012

Just Charming

All sewing projects are on hold while I slice and dice.

I've been wanting to do another charm swap but I just can't seem to find them before they fill up.  Well one fell into my lap.  The What Was I Thinking swap needed some angels so I volunteered.  I just loved the theme of using your existing stash to make up the charms.  No color/pattern restrictions.  As long as it was quilt store quality quilting cottons it was welcome.

I was a bit intimidated by having to produce 120 charms but once I realized I can get 10-12 charms from a fat quarter (depending on the pattern or if I mess up--and yes, I have messed up a few so far) it made the 120 requirement not that daunting.  That's only 12 fat quartes (approximately).  I can definitely part with a dozen fats.

True confession, there are a few in my stash that I'm just not in love with.  I can't say I "hate" them or that I'd never use them but they're just boring/bland (to me).  So those went into the cut pile right away.

Here's what's cut so far:


See what I mean.  That top pile is just kind of *yawn*.  Not truly ugly but not my first choice.  The bottom stack were cut from scraps from when I made Noel (the christmas crocodile).  I like those fabrics well enough but if I can recycle some bigger scraps into charms, that's super awesome.

But don't think I'm just unloading junk I don't like.  I'm definitely including some stuff I like a lot.


Yeah, bust open those stacks of 24 charms and there could be some great surprises.  That's some dia de los muertos fabric I used to make a bag.  I fussy cut up some of the bigger scraps.  It was good practice on fussy cutting (which is trickier than I thought it would be--definitely putting a 5x5 square ruler on my christmas list!).

See, that christmas fabric is really nice and I have a few charms from each design.  Pretty and shiney.

But I'm only half way through cutting.  I still have 60 charms to cut.

This is what's on the cutting mat:


The print at the top is the only one in this group that I really don't enjoy.  Again, don't "hate" it but it's just not something I would buy outright.  It's nice as part of a mystery bundle (and I probably would use it eventually) but why not use it to practice cutting charms and share it.  I bet it's going to make a really great charm.

I'm saving that brown bird print for last since I may have to fussy cut it.  I'll get what I can out of it then fill in with charms from my scrap piles.  I have a few prints in there I want to share.  I'm saving the two christmas prints for last.  I don't want to send too much seasonal stuff (and the gray snowflakes might need fussy cut, too).  Maybe between the gray snowflakes nad the birds, I can get 12 charms?

This is my second charm swap and so far I've had nothing but good experiences.  I should be getting my "Shades of Gray" bundle back in the next few weeks.

OH, and this cutting project is great for the next sewing project I want to do (actually, two projects).  I'm making a scrappy map of the USA (and realized I don't have as much variety in my scrap bag as I thought) so some of the trimmings from this charm cut-a-thon will end up in that project (and some of the charms I get could as well!).  And it's good cutting practice for the quilt I'm going to start (once I get all the fabric--part of the fabric I want for it isn't released yet--once I have it all I'll figure out a very simple patchwork pattern and get down to the getting down).

Thursday, September 20, 2012

Lab Rat Embroidery Hoop

Finally have some pics of the final project I started (on Friday) but just wrapped up last night.

A new hoop to decorate my work cubicle.

First up, a link to the FREE PATTERN

Now, the pics.


Yes, the colors are very muted.

Close up?

Ok.


I had been wanting to stitch up this pattern but wasn't overly motivated until that fabric came my way.  It was part of a JAQS Fabrics fat quarter destash pack I bought.  It was, to be frank, a rare dud.  I couldn't think of what on earth I'd sew with it.  It's just this side of ugly (not that ugly is necessarily BAD) with those froo-froo looking paisley whatevers.  I could have held onto it to pass along in a swap (maybe cut up as charms it would be more subtle?) or just unloaded it somewhere but I felt bad thinking that.  That's how much I really didn't like it (which surprised me).  But not now.  Now I really do like it.

The pics don't do it justice.  While the colors are subtle, they pop more in person.  The rat is done in a very pale gray.  The coat is white and goggles a very light brown.

And yes, you can see my errors.  I had a hell of a time figuring out what color of tracing paper to use because I was afraid a realy dark color would stand out too much after the fact.  So I went with an orange/red one I had.  But then the lines weren't quite dark enough, so I took a ball point pen and lightly went over it.  And of course I made a little drawing error then tried to dab off the pen and it made a smear (there on the test tube).

Hey, what an I say.  I'm still a beginner and this proves it.

But overall I'm quite happy with the finished product and it looks great hanging on my cubicle wall (right under my name plate--man, I hate that name plate).

Tuesday, September 18, 2012

Made on a Friday

You're about to see the stuff I made on Friday 9/14.  But not all of it.  I didn't get a pic of one item, so I'll show it off all on its own once it's finished up.

Friday I was super productive.  See:


I whipped up a quick bag from the Green Bag Lady free pattern/tutorial.  This is the fabric I got from the traveling stash box.  It was outdoor/decorative weight so I figured it needed to be a new shopping bag.  A few of my existing shopping bags are getting very worn and since they're the plastic-y kind (you know, those freebie ones you can send away for from the cereal boxes and such) they aren't going to wash well, so when they're dead, they're dead.

But hopefully not this bag.  It's 100% cotton so it should wash ok.  Though it did mention "dry clean" on the raw edge.  But I bet the worst thing that woud happen to it if I didn't dry clean would be it shrinking a bit and getting a little wonky.  Neither of which is a big deal for a shopping bag.

So this bag counts toward the Green Bag Flash Mob.  And I'm also considering it kind of upcycling/recycling, since the fabric was from that stash box.

Pretty much at the same time I was making that bag, I also made this one.


It's a free pattern/tutorial at Diary of a Quilter (HERE).  It's really super simple and begs to be modified (to add a pocket and/or closures).  But even this super simple version is great.  I took it with me over the weekend and it was very useful.

Close ups!


I bought this bar code print fabric on a lark.  It looked cool.  But once I got it I wondered what on earth I'd ever use it for.  The minute I saw that tutorial I knew I'd found a use for the bar code fabric.


The lining fabric is a Dia de los Muertos print remnant I (again) bought on a lark.  I love how it's a tiny punch of color but doesn't show through the white outer fabric. 

This bag took a yard of fabric total (1/2 yard of each print) but there were decent sized pieces left over (so you could make pockets from the trimmings).

I'd definitely make this bag again.  I'm thinking it would be a great item to make for future charity sales.  Even this simple version (with no pockets or closures) is nice enough to ask $10.  If I didn't think I could sew it myself, I wouldn't think $10 was unreasonable.

I also think I found a use for the Lorax fabric I bought for my sister.  It would make a great bag.

Since I had the whole day to myself, I dedicated a bit of time to my current Work In Progress, too.


I got the remaining 8 squid legs stitched and all 10 legs stuffed.  And let me just say, stuffing is the real time suck on this project.  It's not hard but it is very time consuming.  And a great excuse to sit in front of the t.v.

Now I just need to measure and cut the strip (that attaches the legs to the body) and do the harder part of the sewing.  I think I'll get to that this weekend since I may need to enlist my hubby to help hold the legs still while I sew them to the strip.  Then I think the rest will be hand stitched (again, not hard but kind of tedious).

It made me giddy to see the parts lined up on the bed.  It really showed the size of this project (and has me worrying how on earth I'm going to ship this beast).

Along with the two bags and massive progress on the Squidy Smalls, I stitched a new embroidery hoop to replace the earth day hoop still on display on my work cubicle.  I didn't get a chance to finish it, so I don't have pics of it just yet.  I'm not going to move on to any new projects until I finish that last simple step (so I can get it up at my cubicle--I'm tired of the earth hoop).


Monday, September 10, 2012

Green Bag Flashmob!

Want to get in on something fun that can help save the earth, recycle and/or bust your fabric stash down a bit?

Join Nataliya at Sistercraft Blog for a thre month long Green Bag Flashmob.  Check out the official post HERE.  (the blog is Russian but if you scroll down the post is in English too--in case you don't want to do the google translate thing).

Green Bag Flashmob?  What the heck?

No, you don't have to meet up anywhere or even spend one thin dime.  All you have to do (from Sept 8 through December 8) is make your own bags (any style, any materials) for either yourself or to give away or sell.  And then link up your bags at Nataliya's post and you could win PRIZES.  We all love prizes, right.  (really, check out Nataliya's blog for all the details).

Every re-usable bag you make can take the place of 1,000 plastic bags.  And, face it, re-usable bags are so much nicer to look at than plastic bags.  And the handles don't cut into your hands and fabric bags don't make that annoying crackling sound AND you aren't inadvertantly adverstising for a store if you have your own (advert free!) bags  (or you could advertise your own etsy store or charity).

You can got to Green Bag Lady and get a super simple basic cloth bag tutorial for FREE.

Now stop for one second and think about your fabric stash.  I bet you have some fabric in there that's just been languishing.  This would be a GREAT way to use it up.  Then you could use the bag in place of gift wrap on the next gift you give and you've spared the planet by not using paper wrapping (which just gets tossed out).

OR, you could upcycle old clothes, sheets, or fabric scraps into a brand new bag.  How awesome is THAT?!

Really, we should all be using re-usable bags whenever possible.  It's just a more economical and healthy alternative.  And why BUY re-useable bags when you know you can make one.  Even if you've never sewn before, that Green Bag Lady tutorial is so simple, you CAN do it.

Think about how proud you'll feel if every gift under your christmas tree is wrapped in a re-usable bag.  Then think about how much fun you'll have buying new fabric once you've busted your stash!

You have THREE MONTHS, folks.  Plenty of time to make a bag (or a few dozen).

Every little bit you do to recycle, reduce, and reuse is AWESOME.  Why not start by making yourself (and others) a re-usable shopping bag.

Work in Progress: GIANT SQUID

Beginning to emerge. . .

Though this picture is heinous.  I had to stand on a chair and hold my phone (yes, my pics are from my phone--I'm just too lazy to get a real camera) out over my ironing board to get this.

So that should give you an idea of how large the body is.  It's about 3/4 of my ironing board (which is a generic cheapo Target ironing board--so not some big fancy job).

Sunday I got the majority of the pattern cut out and the head area sewn and stuffed (except the very bottom which I'll fill once I get the whole thing assembled).  I still have to cut out the leg ring strip and the circle that covers the bottom.  But I'll cut the leg skirt strip based on the size of the finished legs (and body) and the bottom circle based on the assembled size.  I probably could cut the leg skirt strip earlier but I'd hate to underestimate the size and then have to cut twice.

I also got the two long legs (I call them arms) sewn and turned.


The arms before I stitched them.  Yup, their almost exactly the same length as my ironing board (just a wee bit bigger).

And yes, I did iron every piece again before I stitched them together (yeah, you see that giant wrinkle there at the bottom of the yellow arm but I got rid of it with a fizz of steam, no problem).

So far, all the sewing has gone really well.  No issues and I'm very happy with the end products.  I just have to work some lumpiness out of the body.  That shouldn't be a huge issue.  The body needs a lot more stuffing before it's done, so working more in should help smooth everything out.  I'm also not overly concerned about mild lumpiness since this sucker will have to be shipped and that will cause a little lumping (and wrinkling--that saddens me a bit what with how dutifully I've ironed every step of the way).

I'm LOVING the sushi fabric.  The print is just the right size for the underside of the tentacles.  You can see plenty of the images and the size gives the feeling of suckers.


The only snag (which is minor and wasn't really a snag, just something I had to keep in mind) is this print has writing on it, so I needed to make sure I cut all the legs so the images ran down the legs (so you could read the printing).  Not a huge deal at all. 

This pattern is also kind of awesome for how easy it is to be economical when cutting the pattern.  I was able to get both head pieces from the width of the fabric and I squeezed the fin pieces in next to them, so it was probably only about a yard (to a yard and a quarter) to get the body pieces cut.  Since I have SO much yellow, I wasn't as uptight about leg placement.  I put the long ones side by side (with the wide ends opposite each other, to conserve) then arranged the smaller legs in the remaining area next to the large legs.  It saved a lot of space but I think I did even better with the sushi fabric.  Since I had to keep the print going the right direction, I couldn't stack the long legs (round end to quare end) so I put them on the sides of the fabric and then arranged the smaller legs in the space between the longer ones. 

I have plenty of fabric should their be any mishaps (god forbid!).  I only had to throw out the tiniest bit of scraps (I toss anything that's just super stringy or the trimmings from the frayed edges) and kept a nice handful of Tester Scraps (those are small pieces that are under one inch in size but still wide enough to make a stitch on--I use them to test my machine when I change stitches or re-thread it or if something isn't going right and I have to fix it).  And I have a nice stack of Usable Scrap.  Usable is anything over about an inch in size and/or has usable images.  Perfect for small patchwork and such.  I think there will definitely be a bit of yardage left when it's all said and done, too.  If I make no major errors, I think I might just have enough yardage to make a medium sized squid (mediums take a yard for the main color and half a yard for the undersides of the tentacles--though with this sushi fabric I might need more, since I have to cut with the print).

I also bought some super cute flannel fabric to make another medium sized squid.  It's whale print.  I bought it specifically to make another medium squid (it was on super clearance, too).

This weekend wasn't all squid, either.  I also cut and stitched up the last of the Spoonflower pre-prints.  Remember all those cute foods?  I just have to stuff and close a whole stack of them and I'm officially DONE with the Spoonflower fabrics. 

I also picked out some fabric for a new hoop for my cubicle at work.  The Earth Day one has been there too long.  I have image that's just perfect.  But first I want to keep working on the squid a bit more.  At least get through the easiest parts (assembling the legs).  Assembling the whole thing will be a bit more tricky so I may have to plan to have an extra set of hands around for that, we'll see.

But so far, so good!

Shared at:

from blank pages...

Thursday, September 6, 2012

Work in Progress: Giant Squid

At long last, it has arrived.


These pictures don't do the yellow color justice.  At all.  The yellow is much brighter and lemony than is shows here.  And it matches the yellow pieces of sushi so well.  I'm very happy with the fabric. 

The fabrics are all washed and ironed (yes, I ironed SEVEN YARDS of fabric!) and now carefully draped over the bed in one of my spare rooms.  I need to wash/dust the floor well before I can start cutting.

I'm going to be a sweaty project, the cutting.  My third floor isn't very well ventilated so it's quite stuffy.  Maybe I'll fire up the fans for a bit and let it air out before I begin the cutting.

I'm so happy I washed and ironed it all right out of the shipping box.  And relieved that nothing funky happened.  I've never pre-washed fabrics before so I was envisioning some great drama in which all the yardage was ruined.  Hey, I'm a worrier, it's what I do.

The fabric wasn't super rough to start and washing definitely softened it even more.  And I'm hoping it also tightened the weave up a bit so when I go to stuff I won't get frizzies peeking through.

Man, I'm so excited about starting this project.

Oh, and I shared this post here:

from blank pages... linky party


Tuesday, September 4, 2012

Got Sew Much Done!

Excellent productive weekend.

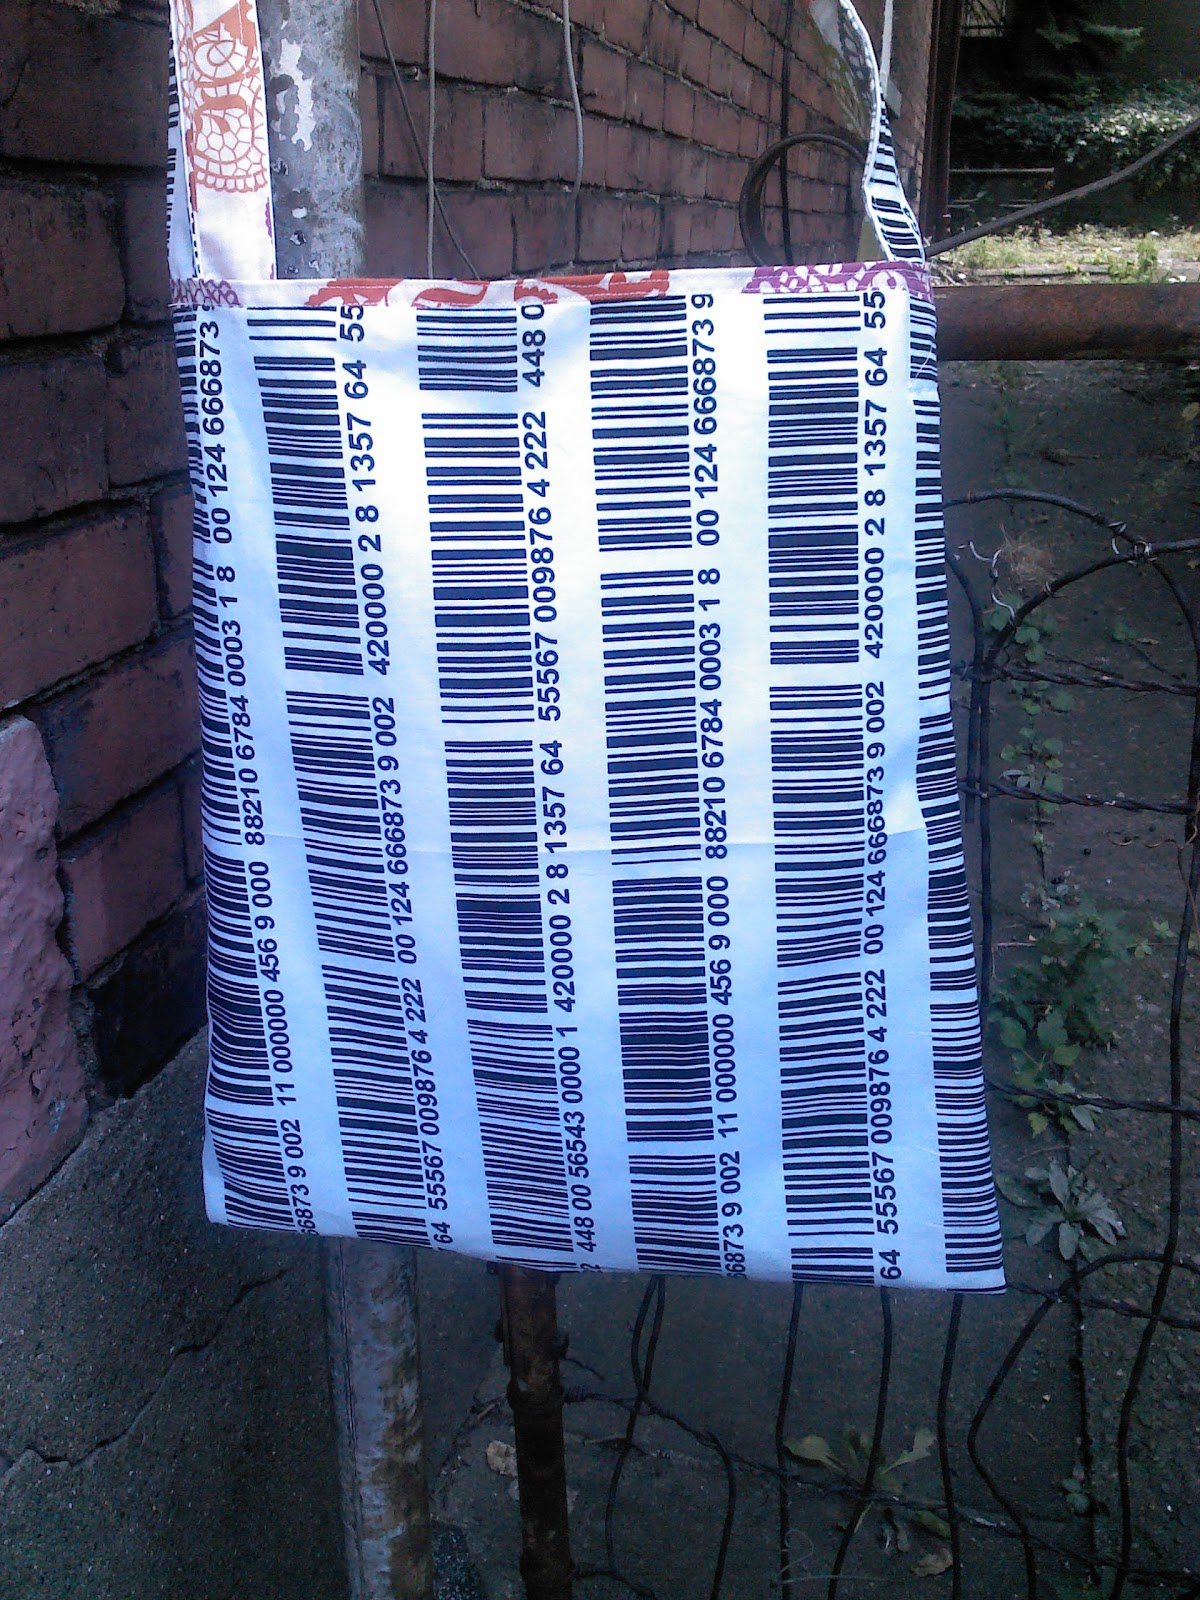
First, I'll mention the one thing I didn't take a pic of but I did show off before.  Remember the Fail Bag (the reversible drawstring one) that I showed off a few posts back?  Well, I made a replacement for that bag and it turned out fabulous.  I just increased the width on the cording tube and it worked like a charm.  More fabric to work with (when sewing) and threading the cord was so smooth and it actually draws all the way closed and open.  I'm happy it worked out because I didn't have enough of the cat print fabric to have a third go at it.

NOW. . .on to the pics.

First up:


I got the tattoo boy DONE!  And I think his name is Sherman.  Yeah, he's a Sherman.

He's the companion for the girl (Heidi) I've had done for quite some time.  Both are from Spoonflower.

He has a tattoo on his chest, one on each arm, one on one leg, and. . .


This giant ship on his back.  It turned out very well and it looks great on him.


Heidi and Sherman.  They're just so happy to finally be together.

(oh and Sherman's legs aren't backwards!  my wife said I should tear out Heidi's and fix them but I told him Heidi is the Queen of the Misfit Toys and is proud of her "flaw").

Next up, a commission trio.


They aren't mine to name, but I did start referring to them as Huey, Doey, and Louie.

These are three of the five commission monkeys.  I'm not a big fan of gender assigned colors for babies, so I tried to go more neutral with the bibs.  Though the warmer colored one does read more "girl" if you'e doing the pink = girl, blue = boy b.s.  So if the buyer really wants to do the stereotypical color stuff, they kind of can.


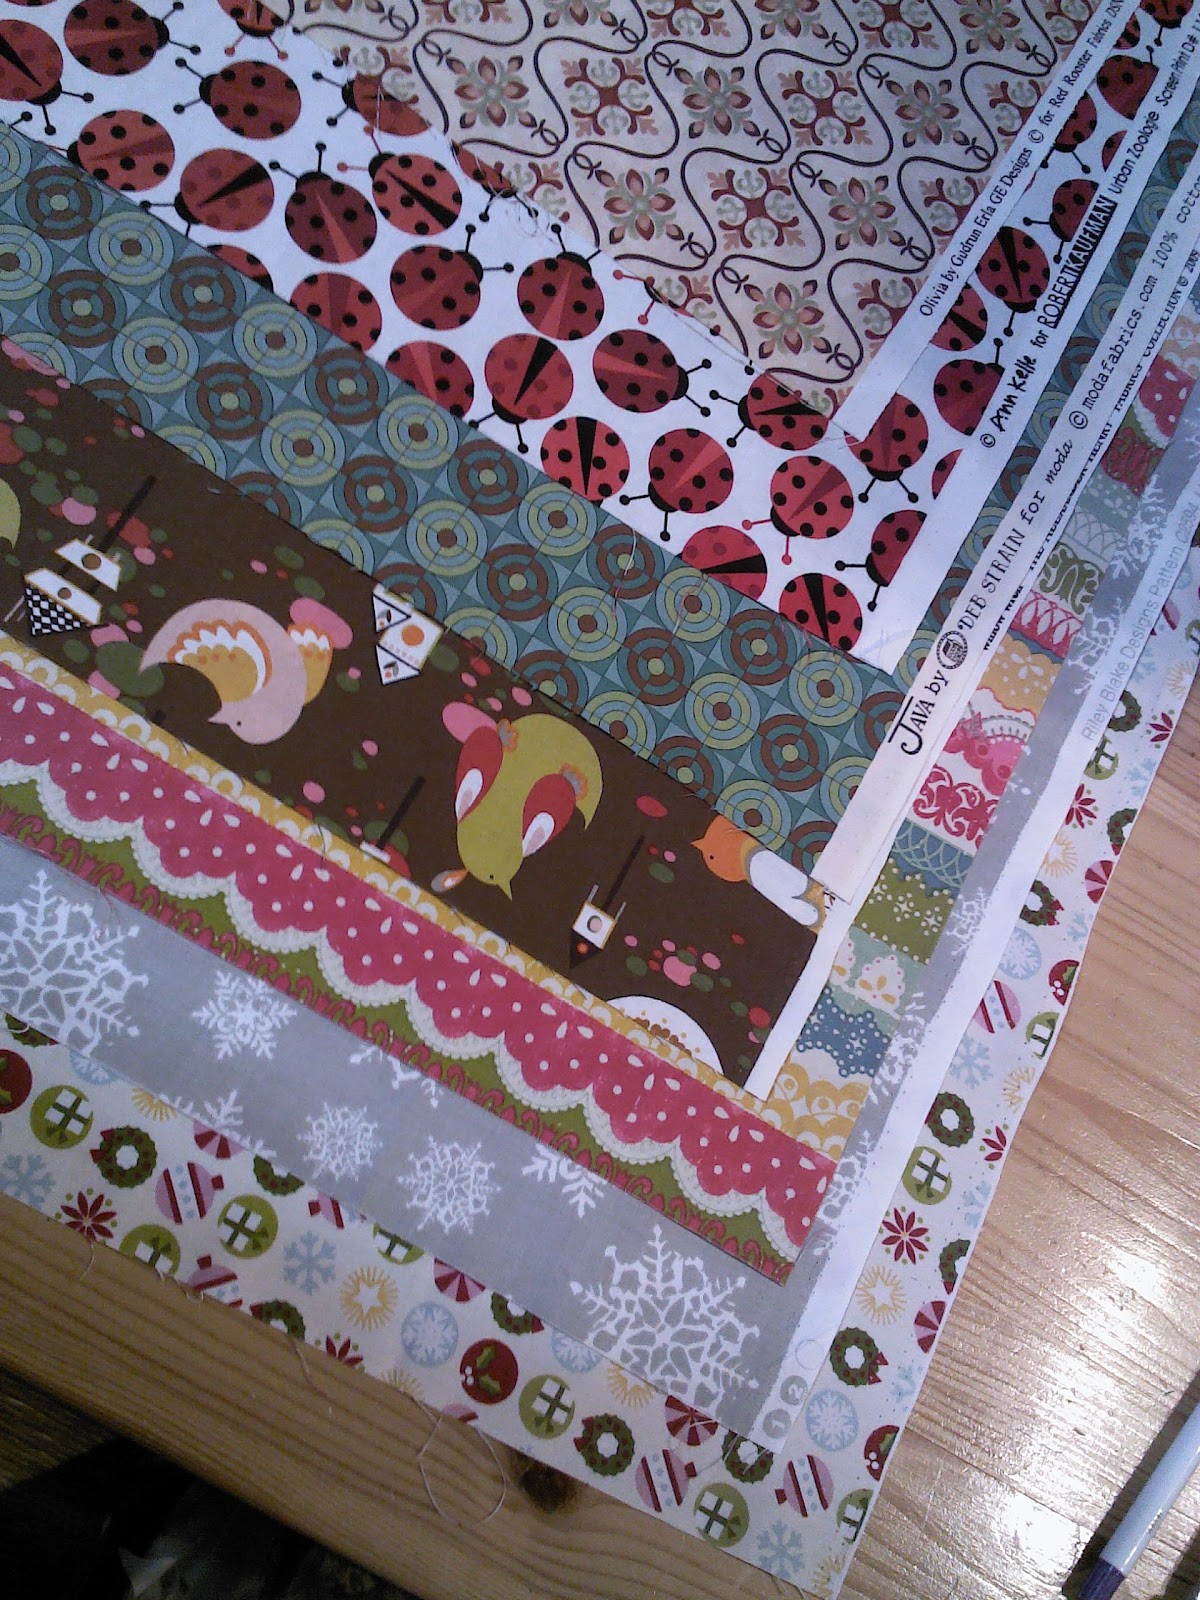
I got to use up some of my fat quarter stash, too.  Lately I'm a bit concerned that I have so much fabric and haven't used enough, so this put my mind at ease.

The bibs were just a quick pattern I drew up on some paper.  At first I thought I was going to do felt on the back and fabric on the front but once I got working with it, a full fabric bib was nicer (and big shout out to the iron, giving me crisp edges!).  All bibs have snap fasteners (and I need to get some larger snaps--I only had small doll clothes sized ones and these bibs are large enough I could have saved my sanity and used larger snaps and it would have looked just fine).

And let me just pause to note how SIMPLE this style of bib (with full straps that go up behind the head) is to make versus the old style (with string style ties).  I was able to go from paper template to finished bib in just a few minutes with no top stitching or drama.  To make an "old school" type bib I'm sure I would have been going nuts.  This style bib also looks more practical (if I was making usable bibs, not just doll clothes).  These snap nice and snug to the neck, so protect from spills better and would stay on better than an "old school" bib (which a baby could probably get off pretty easy).  Though "old scool" bibs are cute, these bibs are simple and look great.


Since these are gifts for babies, they had to be be baby safe.  So no button eyes.  Personally, I prefer button eyes on my monkeys so the "baby safe" ones are kind of boring.  I love pawing through my buttons and finding just the right ones for a monkey.  Felt eyes don't have that same appeal.  Though I was able to give a bit of individuality to the trio, making two have circular pupils and one square.  I think I need to play around more with felt eyes so I can love them as much as I do buttons.


Jeepers creepers, look at those peepers!

And those EARS! 

These are some of the biggest and most professional looking ears I've ever made.  I'm not sure if I love the size but they are cute.  I am sure I love the top stitching.  It's a great look.


If you sit in that chair too long, guys and gals, I'm going to put you to work.

(and for the record, there is some crappy lighting at my office--holy crap, I work in that light!  it's amazing I'm not blind by now)

Speaking of work, I have a buttload to do.  My free time is UP.  Back to the grind.