I've been making things lately but nothing is totally finished so I can't show it off yet. Except this patch.
It's just a random one for the monthly swap in one of my swapping groups. I did it puffy style (the "more teesha" style) and I like how it turned out.
I was just obsessed with doing a peek-a-boo window (reverse applique?) type thing.
Peek-a-boo!
Then, right after I made the window (it's to layers of mesh) I wished I had put some beads inside it so they could roll around in there. Next time!
Then I just did a bit of free motion quilting (see that wonky swirl up and to the right of the window).
And some hand embroidery with a sequin. Gotta have some sequins.
I just couldn't let go of having beads on this, so I had to add them, too. (I tried to see if I could sew them to the mesh but it just didn't work for me so I scrapped that idea. . .but I still want to do them trapped in the mesh so they can slide around).
And the back. I wanted a bright fabric so it would make the border pop. Mission accomplished.
All the fabric was just random scraps so I think this patch was truly in the spirit of Teesha Moore patches. (hee hee, the double circle free motion quilting kind of looks like a butt!)
In Randomness news, I also made a practice quilt. Ok, quilt-let? (maybe the word "placemat" is more accurate, but I made it as a practice quilt so I'm using the word quilt even if the finished project is really small).
I'll be making a lap sized quilt for a swap (using the quilt as you go tutorial from Missouri Quilt Co's youtube channel) but since I'm still a fairly raw beginner at doing a full quilt (I've only ever made one small wall hanging one) I wanted to get the feel of all the processes before I started out on the big quilt (it's not huge, but it is decent sized at 36x48).
So I raided my scraps for the strips and got a FQ-ish sized piece of fabric for the back and just made a little sampler. Doing the assembly was easy since it is quilt as you go (so you have the backing, pad, and top together the whole time). The binding wasn't bad, either. I think the messiness I encountered when attaching it (I didn't quite keep "in the ditch" in some spots!) is due to the shape not being even. Since I was doing this as a practice, I wasn't super careful or concerned about the edges being absolutely straight which made the binding get a little wonky along the way. That and I got one of the corners goofy (need to look at a few tutorials to freshen my mind about how to do the mitre. . .I understand it but when I go to execute it I always want to do something backwards. . .same with joining strips to make one long strip, I ALWAYS do it wrong the first time, ALWAYS).
So, I made a little practice quilt-let which is now something for my cats to sit on. I put it on the floor for them and they both had to put their holes right on it. That is a sign that they approve, putting their hole on something (yes, that includes putting their hole on YOU).
Now I need to make the real quilt (fabric strips are already prepped and I'm waiting for my batting to arrive since I thought I had the right size only to find out I didn't *headdesk*) and I'm working on a few other swaps.
Next up on the blog? Fabric review!
Showing posts with label free motion quilting. Show all posts
Wednesday, May 27, 2015
Thursday, March 19, 2015
Patches for swaps: Two random and two Suess themed
Patches, patches, patches.
That random one and the one below are for the same monthly swap. I made them in the fluffy style (which is considered the "true" teesha moore style) and just did random stuff with them.
The one above there was just some practice with free motion quilting.
This one started out random (well, I wanted to play with reverse applique) but then it morphed into a wacky face.
I blame the curly cue I free motion quilted in the top corner. That made me think of a face (along with the netting along the right side--aka the hair).
It's creepy and kind of weird and I really like how it turned out. I think it's really very much in the spirit of teesha moore patches.
The next pair were a themed swap. Dr. Suess.
I happened to have some neutral Suess fabric in my stash (got it in a FQ swap at least a year ago). So I just embellished that fabric.
I was in a bead mood so I went with that theme. I didn't intend this to be a heart but after I played with it it just became a kind of heart.
It needed a bit more, so I added some elephant sequins and a bit of beaded fringe along the top. There's also some random embroidery coming out of some of the trunks (and on some of the flag poles).
That's the back. I bought this fabric (just a 1/4 yard) specifically for this swap thinking I'd fussy cut and fuse some of the images to make a patch but then I didn't want to. I wanted to use the elephant fabric (which was my first idea).
Ok, this next one is one of the most fun things I've ever made (and I really like it).
Yes, those are truffula trees complete with wool roving fluffy tops.
Gaze in wonderment at my crazy creativity (and modesty!).
The trunks are just a zig zag stitch (on a short stitch length) twice over (so go over the line twice). then I added the stripes with fabric pen. SO FREAKING EASY and it looks pretty damn good.
The tops are bits of wool roving. I pulled off a tuft and then fold/rolled it up on itself to make a loose ball (leaving one end free). I sewed the loose ball to the patch and then folded the loose end/tuft over the stitching to hide it. Little spot of glue and it kept the tufts down. (though re-gluing might be necessary once it's received since the glue was just on the fibers so couldn't make a super tight bond--it seemed to hold really well on a few but one of them looked like it wanted to pull up).
I didn't want to actually needle felt them because I didn't want the poke marks showing on the tuft. I could have probably gotten away with felting the ball part (that I stitched down) because it wouldn't be visible but (honesty alert) I was too lazy to go up to my craft room to get my needles so I didn't. (so. lazy.)
The back. Lorax fabric, of course.
Ok, I have a few more things to bomb with today (I think--maybe I'l wait until tomorrow, I have to check my pics and see what I've shown off already).
Tuesday, January 27, 2015
Patches, patches, patches!
I'm bombing my blog today. First up are all the patches I made for swaps lately.
First swap was for a pair of patches. Then I did a RAK patch for the same person, so the total was up to 3.
There was no theme for the pair but the extra did have a theme.
Full set.
Now the weirdest of the group.
The teeth are totally reflecting off the fabric. The face fabric is some funky vinyl my sister gave me after she made a domo costume (a few years ago). I just wanted to use some different fabrics and try to make something "creepy".
I'm not sure how successful it is, but I do think it's kind of creepy. The teeth are definitely kind of icky. I bought those beads because they looked like pulled teeth.
Next in the set is far less icky.
I made it in the more classic Teesha Moore style (referred to as either "puffy" or "messy" or "rolled edge").
I got to double dip with this patch and do some free motion quilting practice with this one. Playing with free motion is one of my 2015 goals so that was super sweet. I've also been dieing to use one of the cool gnome buttons I have.
The back is definitely messy!
Last was the RAK/wish patch. The recipient gave a list of patch themes they were looking for and mermaids was on the list.
I love when mermaids are pictured riding sea horses. Sea horses as beasts of burden makes me giddy. That would mean it's either one big ass sea horse or one teeny mermaid. Either way, I like it.
I gave her super kissy lips with some embroidery floss. MWAH!
The back (just because I feel obligated to show the backs).
Next up was a set of three patches for another swap. There was no theme for these so I had to figure out what to do on my own. I did consult my partner's profile to see what they HATED so I could avoid that as much as possible.
Did this one in the puffy/rolled style. I really like how it turned out.
I machine stitched around a few of the keyholes and then added a key on a beaded string. Put a few more bits of embroidery (hand) on it too, just to make it more puffy/lumpy.
The back (of course!).
Since my partner was very exact about things they didn't like, quite a few of which are things I adore (neon colors, glitter, hippy stuff, goofy/kiddy stuff) I went out of my way to try and find more refined themes. No swag moose for this group (or kawaii poo!)
How's that for classy, huh?
That's from the Matisse inspired fabric I got in one of my last scrap pack purchases. Just embellished it here and there and then made sure to use a brown backing fabric to get a real frame feel. (this one is a flat/neat style)
See, brown back.
Last but not least for this group:
I was dieing to do some beading so I did. There's just something about beading that's kind of relaxing. But I need to read up on it a bit more to see the best method for beading a long line of beads. I'm thinking (as I did with this patch) that you really shouldn't go longer than about 10 beads before stopping and doing another little length of ten. More than that and it gets kind of droopy.
I love the feel of a totally beaded piece like this. It has a heft to it but is still bendable and just so THERE. This isn't perfect beading by any stretch, but it looks pretty damn good.
And the back.
Last of the recent patches was for a Valentine's themed patch.
OH YEAH. Now that's my bag.
Silly and bright and goofy. LOVE IT.
I really had no idea what I was going to do except I wanted to make some half square triangles (another 2015 sewing goal) so I took all the 5 inch v-day themed charms I had and then made quarter triangles. Is that the right term? Whatever the term, I have four different fabrics each in a wee triangle. The five inch charms yielded four four inch block/charms each with one of the fabrics on it.
So that's the background fabric which I added a little felted heart to the middle can't tell, really). Then I was kind of stumped what else to add until I got pawing through my buttons and noticed just one of the sock monkeys had a heart on him.
Then a sock monkey being carried off by two glittery dog balloons happened and I'm thrilled it did. I've been dieing to use some of those dog balloon stick ons. I had to add a piece of clear thread around the middle of the pink one because she just wouldn't stay stuck down. Filament for the win (though it's still a pain in the ass to work with).
And. . .the back!
So, that's all the patches I've made lately. Now time to show off the other stuff.
(no joke, I was off work yesterday and I sewed like a fiend)
First swap was for a pair of patches. Then I did a RAK patch for the same person, so the total was up to 3.
There was no theme for the pair but the extra did have a theme.
Full set.
Now the weirdest of the group.
The teeth are totally reflecting off the fabric. The face fabric is some funky vinyl my sister gave me after she made a domo costume (a few years ago). I just wanted to use some different fabrics and try to make something "creepy".
I'm not sure how successful it is, but I do think it's kind of creepy. The teeth are definitely kind of icky. I bought those beads because they looked like pulled teeth.
Next in the set is far less icky.
I made it in the more classic Teesha Moore style (referred to as either "puffy" or "messy" or "rolled edge").
I got to double dip with this patch and do some free motion quilting practice with this one. Playing with free motion is one of my 2015 goals so that was super sweet. I've also been dieing to use one of the cool gnome buttons I have.
The back is definitely messy!
Last was the RAK/wish patch. The recipient gave a list of patch themes they were looking for and mermaids was on the list.
I love when mermaids are pictured riding sea horses. Sea horses as beasts of burden makes me giddy. That would mean it's either one big ass sea horse or one teeny mermaid. Either way, I like it.
I gave her super kissy lips with some embroidery floss. MWAH!
The back (just because I feel obligated to show the backs).
Next up was a set of three patches for another swap. There was no theme for these so I had to figure out what to do on my own. I did consult my partner's profile to see what they HATED so I could avoid that as much as possible.
Did this one in the puffy/rolled style. I really like how it turned out.
I machine stitched around a few of the keyholes and then added a key on a beaded string. Put a few more bits of embroidery (hand) on it too, just to make it more puffy/lumpy.
The back (of course!).
Since my partner was very exact about things they didn't like, quite a few of which are things I adore (neon colors, glitter, hippy stuff, goofy/kiddy stuff) I went out of my way to try and find more refined themes. No swag moose for this group (or kawaii poo!)
How's that for classy, huh?
That's from the Matisse inspired fabric I got in one of my last scrap pack purchases. Just embellished it here and there and then made sure to use a brown backing fabric to get a real frame feel. (this one is a flat/neat style)
See, brown back.
Last but not least for this group:
I was dieing to do some beading so I did. There's just something about beading that's kind of relaxing. But I need to read up on it a bit more to see the best method for beading a long line of beads. I'm thinking (as I did with this patch) that you really shouldn't go longer than about 10 beads before stopping and doing another little length of ten. More than that and it gets kind of droopy.
I love the feel of a totally beaded piece like this. It has a heft to it but is still bendable and just so THERE. This isn't perfect beading by any stretch, but it looks pretty damn good.
And the back.
Last of the recent patches was for a Valentine's themed patch.
OH YEAH. Now that's my bag.
Silly and bright and goofy. LOVE IT.
I really had no idea what I was going to do except I wanted to make some half square triangles (another 2015 sewing goal) so I took all the 5 inch v-day themed charms I had and then made quarter triangles. Is that the right term? Whatever the term, I have four different fabrics each in a wee triangle. The five inch charms yielded four four inch block/charms each with one of the fabrics on it.
So that's the background fabric which I added a little felted heart to the middle can't tell, really). Then I was kind of stumped what else to add until I got pawing through my buttons and noticed just one of the sock monkeys had a heart on him.
Then a sock monkey being carried off by two glittery dog balloons happened and I'm thrilled it did. I've been dieing to use some of those dog balloon stick ons. I had to add a piece of clear thread around the middle of the pink one because she just wouldn't stay stuck down. Filament for the win (though it's still a pain in the ass to work with).
And. . .the back!
So, that's all the patches I've made lately. Now time to show off the other stuff.
(no joke, I was off work yesterday and I sewed like a fiend)
Friday, December 19, 2014
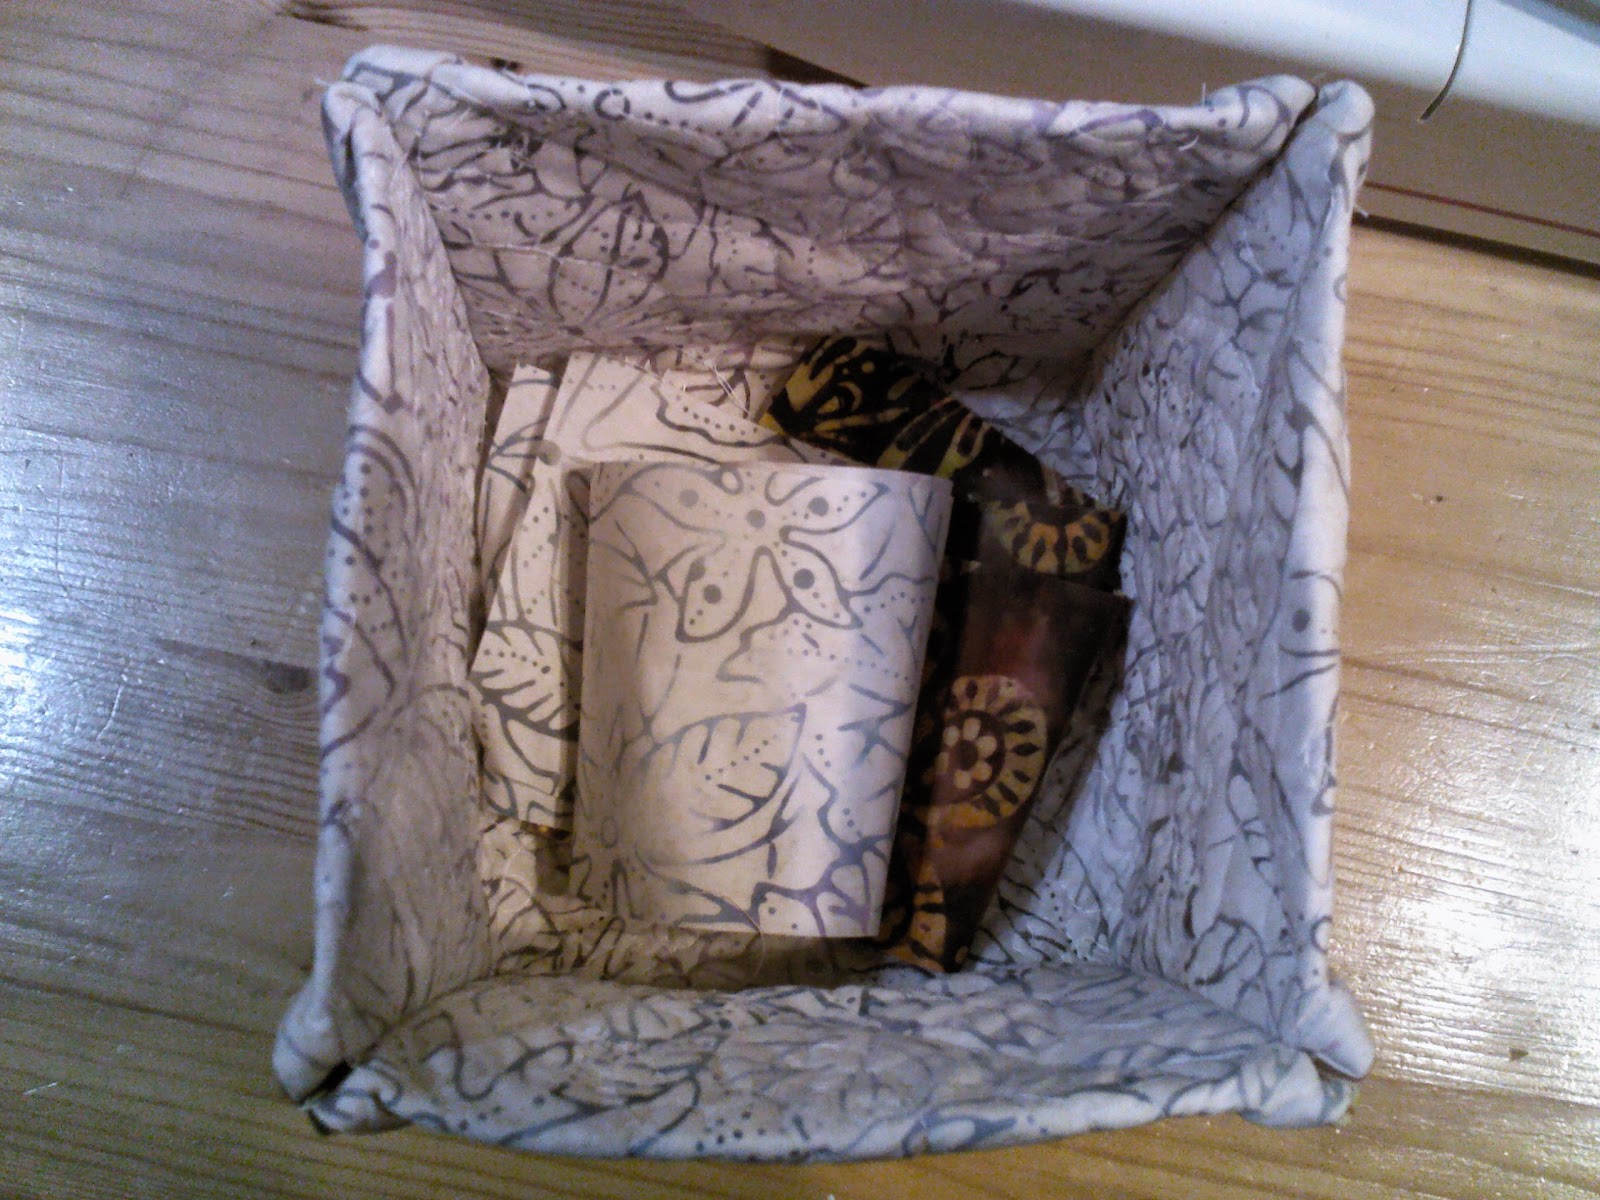
Sewing for Me: Fabric Basket
In a shocking twist, last night I not only whipped ups something just for me, but it was something PRACTICAL and, and, and, I used some of the fabric I JUST got.
So freaking shocking, I know.
I used two of my new batik fat quarters to make a fabric box to catch my thread trimming and bitty scraps that I throw away.
What? I finally got rid of the paper bowl (like disposable paper bowl, not something fancy) I had been using? Yes, I did.
I used the tutorial at Freemotion by the River.
It was a great way to make something useful from a free motion quilting practice sandwich. I always feel kind of guilty making practice sandwiches but this will help me get over that.
Look at that HORRIBLE quilting. But in my defense, it's only about the third time I've tried free motion quilting. And I really wasn't trying to do my best or use any type of plan. This was true playing. I do need to go check and see if I should be setting my stitch length to the longest or the shortest. I get the feeling it should be shortest and I went longest, which didn't help my case any.
(hmm, I just did a quick search and it seems I don't need to fiddle with the stitch length at all since I control the stitch length as I move the fabric. DUR, that makes perfect sense!)
Despite the fugtastic quilting, the box turned out great. I even remembered to pay attention and cut the corners on the correct color fabric.
My machine didn't have any trouble with the extra thickness when closing the corners (to hide the cut off part) or when I sewed the flaps down.
I did go off pattern a bit.
Since I was using fat quarters, I decided to go with 18 inch fabric squares. That way I wasn't going to end up with a weird little scrap from the length that I'd just be looking at with a "what the hell am I going to ever do with YOU?" face. (the original pattern called for 16 inch squares)
I trimmed up the fat quarters to get them even top and bottom (so just fuzzy waste) and then cut them at 18 inches wide. So I was left with a usable strip of scrap fabric. I didn't even bother trimming off the selvage edge. That was mostly because with batiks the selvage isn't as obvious and I was fairly certain it would be totally hidden anyway. And this was just a project for myself so I wasn't overly concerned about it being picture perfect.
For the corners, I went in 2 inches.
I machine sewed the flaps down and didn't bother with the buttons. It seemed wasteful to use buttons on something that was made out of free motion practice and was made purely to be a practical item. I can always embellish it later if I decide to. I could use it to display pins (like fashion pins, not straight pins). That's actually a cool idea. I like pins but I never want to put them on my coats/bags because I'm afraid they'll get lost. OH YEAH, how's that for a fun idea I just had while I was typing.
I definitely think I'd make this project again. I'm sure I could find uses for more crap catchers. I've even thought about making a bigger one to house my cats' toys. It would need to be pretty big, they're horribly spoiled and have a ton of toys.
So freaking shocking, I know.
I used two of my new batik fat quarters to make a fabric box to catch my thread trimming and bitty scraps that I throw away.
What? I finally got rid of the paper bowl (like disposable paper bowl, not something fancy) I had been using? Yes, I did.
I used the tutorial at Freemotion by the River.
It was a great way to make something useful from a free motion quilting practice sandwich. I always feel kind of guilty making practice sandwiches but this will help me get over that.
Look at that HORRIBLE quilting. But in my defense, it's only about the third time I've tried free motion quilting. And I really wasn't trying to do my best or use any type of plan. This was true playing. I do need to go check and see if I should be setting my stitch length to the longest or the shortest. I get the feeling it should be shortest and I went longest, which didn't help my case any.
(hmm, I just did a quick search and it seems I don't need to fiddle with the stitch length at all since I control the stitch length as I move the fabric. DUR, that makes perfect sense!)
Despite the fugtastic quilting, the box turned out great. I even remembered to pay attention and cut the corners on the correct color fabric.
My machine didn't have any trouble with the extra thickness when closing the corners (to hide the cut off part) or when I sewed the flaps down.
I did go off pattern a bit.
Since I was using fat quarters, I decided to go with 18 inch fabric squares. That way I wasn't going to end up with a weird little scrap from the length that I'd just be looking at with a "what the hell am I going to ever do with YOU?" face. (the original pattern called for 16 inch squares)
I trimmed up the fat quarters to get them even top and bottom (so just fuzzy waste) and then cut them at 18 inches wide. So I was left with a usable strip of scrap fabric. I didn't even bother trimming off the selvage edge. That was mostly because with batiks the selvage isn't as obvious and I was fairly certain it would be totally hidden anyway. And this was just a project for myself so I wasn't overly concerned about it being picture perfect.
For the corners, I went in 2 inches.
I machine sewed the flaps down and didn't bother with the buttons. It seemed wasteful to use buttons on something that was made out of free motion practice and was made purely to be a practical item. I can always embellish it later if I decide to. I could use it to display pins (like fashion pins, not straight pins). That's actually a cool idea. I like pins but I never want to put them on my coats/bags because I'm afraid they'll get lost. OH YEAH, how's that for a fun idea I just had while I was typing.
I definitely think I'd make this project again. I'm sure I could find uses for more crap catchers. I've even thought about making a bigger one to house my cats' toys. It would need to be pretty big, they're horribly spoiled and have a ton of toys.
Subscribe to:
Posts (Atom)