And the winner of the traveling stash giveaway is. . .
Comment #7. . .
VROOMANS QUILTS
---------
I've sent the "congratulations" email. Vroomans Quilts, please reply to that email so I can get the stash moving on to you.
THANK YOU, to everyone who participated.
Friday, August 31, 2012
Thursday, August 30, 2012
Crafting for Charity: Stockpiling! (and a fail!)
While I was waiting for the socks to arrive (so I could begin the Great Sock Monkey Commission), I wiled away a few hours making a few things for the next Regretsy Charity Sale (or any other charity thing that may come along while I wait).
First up, some more ewoks.

I was going to do a tutorial for these (even took photos as I was making them) but in a word, the photos sucked and Wild Olive (where you can get the pattern) already did a tutorial (with good pics) so why re-do something that didn't need re-doing?
I will note that I have altered the original tutorial. For non-felt ewoks I sew and turn (meaning sew on the wrong side then turn the item right side out) versus sewing on top (the original tutorial uses courderoy and is sewn on top--meaning no turning). I prefer a more finished edge. So my ewoks are a tiny bit smaller. Except for the felt one (he's on the left). With felt I surface sew (no turning) and the finished product was a little bigger. I think all three are super cute. I'm planning to make at least three more once all my commissions are done.
But I don't want to fill my charity coffers with just ewoks.
My charity coffers need. . .KITTIES!!


MEOW!
You can't tell from the pic, but the black one does have stitched whiskers and leg lines. But they're black so don't stand out. As anyone who's had black cats can attest, sometimes if your cat is sititng just right they kind of look like a big black blob.
The second cat is so cute I almost want to keep him for myself (and I may have named him Graham--he looks like a Graham). Graham is the first kitty I've made who had dimensional whiskers and I like the effect. He's also the only pattern I hadn't yet tried out (the patters are over at Nuno Life --just look through that whole blog--tons of great stuff there). I like how you can mix and match the heads and bodies (and that one set is clearly a Siamese).
OH, and so you can see just how small these are.

Graham posing next to a regular sized teaspoon (aka "eating spoon"). So they're pretty small. But very easy to make. I made this pair while I was visiting my family. They take about an hour each (from cutting to final stitch).
While the kitties alone are definitely worthy of being added to the charity coffers (I've used coffers THREE times now--let's see how many more times I can use it!) I wanted to offer something else along with them, kind of sweeten the deal.
What about. . .a BAG. Just a simple little drawstring bag. In fact, it's the same tutorial for the patchwork drawstring bag only without the patchwork. So even easier.


Kitties on one side. Sushi on the other.
The only snag?
This bag is a big ass FAIL. It's a drawstring bag that doesn't "drawstring". I made the cord area too narrow so it only pulls down about a quarter of the way.
OOPS.
So I need to make a new one for the charity coffers. This one will join my Island of Misfit Toys (or I might include it with a charity purchase as a "free bonus"). It's still usable but just not as it was intended. And it is made well just (technically) not RIGHT.
I have enough of the kitty fabric to just one more (but plenty of sushi fabric and the polka dot fabric). These bags and the ewoks are perfect for fat quarters. I can get a whole bag out of one fat quarter (or two halves if I'm doing different fabrics for the reversibles).
I think I'm going to make one more kitty for this set so I can title it "Three Little Kitties". Or I might go with "Sack of Kittens". I plan to make "Sack of Puppies" as well. I want to continue the "sack" theme and make different cats/dogs (from other patterns) for inside cat/dog themed bags. And other animals. I have some super cute circus fabric that I could use to make a "Sack of Circus" or "Sack of Zoo". I can also make handled bags to go with toys that are larger.
And I do have this super funky OPOSSUM fabric. I want to figure out (or find) a pattern for an opossum toy so I can have a "Sack of Possum". Or maybe a "hillbilly" animal sack, with a possum and a groundhog.
What else have I been up to lately?
I sent out my charms for the Shades of Grey charm swap I joined. Happy to report I didn't mess up anything so the extra half yard I bought is now mine to do with however I see fit (it's the ghost print from the Guising set, so I think I might make a halloween themed set of something or other for the charity coffers).
I'm also done with the embroidery on the last spoonflower tattoo doll and have the limbs all sewn together. Just have to put it all together and it's done.
But first, I have to get to the sock monkeys. I need to either find or draw up a sock monkey sized bib for them.
OH, and I'm thinking (for myself). . .Sea Monkey Sock Monkey. Yes, a combining of two fun things in one. But first I need to get all my commissions finished.
Friday, August 24, 2012
The first Noel (a christmas crocodile)
At long last!
*trumpet flourish*
She is complete.

And her face is on the correct end (no more butt fah-say!).

Jeepers creepers, check out her peepers!
Now, I have to say a few things about the pattern and all that. The pattern is from the "Toys to Sew" book. Yes, the same book I gave away a copy of a while back.
While this is a good book (lots of cute ideas) it's not very user friendly (for beginners). There aren't a lot of step by step tutorials/photos and it really does assume you have a more than basic knowledge of sewing.
With this pattern in particular, I found the piece of patchwork they say to make was a little stingy. True confession, I was not super careful when laying out my pieces so I ran out of patchwork when it came time to make the legs. So some sides of the legs are single pieces. But even if I had been very careful I still think the piece of patchwork fabric wouldn't have been quite big enough.
That's my one major criticism of this pattern. I think at the very least the instructions should have reminded folks to place pattern pieces very carefully (or advise to make patchwork a bit bigger if you're worried you may run out).
As for the instructions, here are some tips the book doesn't give that I feel would have been helpful (even though I have some decent sewing experience, these tips always bear repeating).
1. BASTE. Yes, it's annoying but it's SO worth it. Especially if you're attaching limbs at the same time you're sewing the sides of a piece together (versus attaching limbs to finished bodies). Basting holds the limb in place but it also gives you the chance to double check placement BEFORE you machine sew the whole body together. This is vital when you're attaching the limbs to the body before you turn and stuff. Baste the limb on then give a little pre-turn to the piece so you can see what it will look like. It will save you getting everything done only to find out a leg is on backwards. Tearing out basting stitches is nearly painless veruses tearing out machine stitches.
2. Lay out pattern pieces BEFORE tracing and cutting. Another step that seems redundant but it will save you annoyance later. Take the pattern pieces and just lay them out on the fabric first to get a rough idea how much space they will take. That way you can head off any issues before they arise. This is particularly important if you're using fabric you have in limited supply (like the patchwork used for this project).
Overall, the pattern wasn't hard to do even with the brevity of instructions.
More pics?
Ok.


All the fabrics were from a mystery fat quarter set I got from the Fat Quarter Shop. I love mystery fat quarter packs but was a little caught off guard by this one. I simply wasn't expecting christmas themed fabric. Especially "fancy" christmas fabric. This set (I forget the exact name right now) has rich colors and even gold accents. I had no idea what to do with it until I remembered this patchwork crocodile.

It really is great fabric. You can see there are repeating patterns (in different colors) and unique patterns (trees with forest animals like deer and quail and gold accent snowflakes) and even some prints that weren't necessarily "christmas" (you could get away with using them for non seasonal stuff).

And I'm very happy to report that Noel is "good enough" for donation to a charity sale. A lot of times the first stab at a pattern has good results but not "good enough" to ask someone else to pay money for it (or to even give away as a gift). You need to give the pattern one more stab to clean up any little errors you encountered.
But not Noel. She came together VERY well, even with having her face (temporarily) attached to her bum. I would be proud to offer her for a charity sale. In fact, I think I'll put her on my "future charity sale" shelf (along with three new ewoks I made). I think someone would pay $20 for her. She's very "whimsical". Who doesn't want a crocodile for christmas?
*trumpet flourish*
She is complete.


Jeepers creepers, check out her peepers!
Now, I have to say a few things about the pattern and all that. The pattern is from the "Toys to Sew" book. Yes, the same book I gave away a copy of a while back.
While this is a good book (lots of cute ideas) it's not very user friendly (for beginners). There aren't a lot of step by step tutorials/photos and it really does assume you have a more than basic knowledge of sewing.
With this pattern in particular, I found the piece of patchwork they say to make was a little stingy. True confession, I was not super careful when laying out my pieces so I ran out of patchwork when it came time to make the legs. So some sides of the legs are single pieces. But even if I had been very careful I still think the piece of patchwork fabric wouldn't have been quite big enough.
That's my one major criticism of this pattern. I think at the very least the instructions should have reminded folks to place pattern pieces very carefully (or advise to make patchwork a bit bigger if you're worried you may run out).
As for the instructions, here are some tips the book doesn't give that I feel would have been helpful (even though I have some decent sewing experience, these tips always bear repeating).
1. BASTE. Yes, it's annoying but it's SO worth it. Especially if you're attaching limbs at the same time you're sewing the sides of a piece together (versus attaching limbs to finished bodies). Basting holds the limb in place but it also gives you the chance to double check placement BEFORE you machine sew the whole body together. This is vital when you're attaching the limbs to the body before you turn and stuff. Baste the limb on then give a little pre-turn to the piece so you can see what it will look like. It will save you getting everything done only to find out a leg is on backwards. Tearing out basting stitches is nearly painless veruses tearing out machine stitches.
2. Lay out pattern pieces BEFORE tracing and cutting. Another step that seems redundant but it will save you annoyance later. Take the pattern pieces and just lay them out on the fabric first to get a rough idea how much space they will take. That way you can head off any issues before they arise. This is particularly important if you're using fabric you have in limited supply (like the patchwork used for this project).
Overall, the pattern wasn't hard to do even with the brevity of instructions.
More pics?
Ok.


It really is great fabric. You can see there are repeating patterns (in different colors) and unique patterns (trees with forest animals like deer and quail and gold accent snowflakes) and even some prints that weren't necessarily "christmas" (you could get away with using them for non seasonal stuff).

And I'm very happy to report that Noel is "good enough" for donation to a charity sale. A lot of times the first stab at a pattern has good results but not "good enough" to ask someone else to pay money for it (or to even give away as a gift). You need to give the pattern one more stab to clean up any little errors you encountered.
But not Noel. She came together VERY well, even with having her face (temporarily) attached to her bum. I would be proud to offer her for a charity sale. In fact, I think I'll put her on my "future charity sale" shelf (along with three new ewoks I made). I think someone would pay $20 for her. She's very "whimsical". Who doesn't want a crocodile for christmas?
GIVEAWAY: Traveling Stash!! (ENDED!)
Want to win the chance to get your hands on a big ole box of sewing/crafting items? A box you can gleefully pick through, take what you want (then add some new things to) and then share with someone else?
Yes?
Ok, then you want to get in on this giveaway.
First up, the rules to participate (Box Rules, if you will):
1. Be an active blogger. Post about receiving the giveaway on your blog in a timely manner.
2. There's a note in the box that logs where it has been. Please add your name and location (full address not necessary) and return the sheet to the box.
3. There's a list of Rules and Guidelines (in the box). Read and follow them (and make sure they stay in the box).
4. You can take anything you like from the box. Just replace every item with comparable quilt shop quality items equal to the amount taken. (the "in box" guideline sheet gives more info on this--but the basic premise is, don't be stingy--if you take a ton, replace it all so the next person has a chance at some good stuff, too).
5. Ship the box to the next person in a reasonable amount of time.
6. Due to the size of the box (and postage costs) U.S. shipping only.
-------------------------
So, what a sneak peek at what's doing in this Traveling Stash?

Just one peek. Don't want to spoil the surprise. I will say that it's jam packed and there is a lot of variety. Lots of fabric (about half the box is just fabric) and some notions and patterns. I had no problem finding things I wanted (and there were a few things I liked but couldn't see an immediate use for, so I left them for others--no need to be greedy).
Nope, I'm not going to show you what I got. Don't worry, once I use what I took I'll end up showing the finished product(s) here and mention the traveling stash again.
BUT. . .I will show you what I'm adding to the box. Hey, I want you to be excited about this bad boy so you need just a taste of what you have a chance at getting.

There are two spools of Disney Eeyore ribbon, two fat quarters of brand new designer quilting cotton fabric (unwashed), two skeins of embroidery floss, a paper cut out (for scrap booking) and a pair of Fisker's scissors (that cut a fancy design--I think they're for paper cutting).
I was so excited to go through my crafting/sewing stash. I think I managed to find some great things others will like (and that I'm happy to share--better to give them away then let them gather dust at my house).
SO. . .you want to win a chance at this box full of goodies?
GIVEAWAY RULES:
1. Leave a comment on this post.
That's it. One rule, one chance. Easy Peasy.
Please remember, this is for U.S. addresses only. Sorry, international folks. Also, this is a traveling stash so you will have to pay to send it to the next person.
I can't wait to see where this ends up next.
GIVEAWAY ENDS: 8/31. Winner will be drawn at random and notified via email. If you are an anonymous commenter, please leave an email address in your comment (do it the "no spam" way: me(at)location(dot)com ). Winner has 3 days to reply with shipping info. If winner does not reply, new winner will be drawn. Winner will be announced in a separate post.
Thank you for checking this out and GOOD LUCK!!
Thursday, August 23, 2012
Why I should not sew after 10 p.m.
Yup. Last night I sat down to finish the patchwork crocodile.
It was almost completed, right at the stage where I tend to push a project aside and leave it (when all I need to do is sit with it for another hour or so and it would be done).
So I'm plugging away at the crocodile. Let me just pause to say attaching limbs directly to the seam (where you tuck them inside the item while you sew it then turn and POOF, the limbs are there all perfectly attached) always causes me grief. Its like I get blunt force head trauma and just can not figure it out. Well, I can figure it out (in the sense that I know what to do) but I have to physically do it (like pin and then do a fake turn out to make sure it's right) more than once before I finally get it right. Last night was pretty typical. I pinned the legs where I wanted them then quasi-turned the piece to see how the legs would face. And of course they were wrong. So I re-pinned then basted the front set on. Gave a quick mini-turn and. . .they were facing the wrong direction. Tore the basting out and re-basted. Finally they were right. Then I had to go through almost the same production for the rear legs (only this time I didn't have to baste twice).
Once I finally got the legs on and the whole body sewn, turned, stuffed, and closed it was on to the face. I dutifully finger pressed the seams under and held them to the body to find the placement and then stitched them on. They looked fabulous. Then it was on to the stitched teeth.
I labored to get all the stitching done (using yarn and a fat eye needle) and it looked quite good if I do say so myself. As I'm holding the finished piece up and examining it I wonder aloud if it needs nostrils (something not in the original pattern). So I even put some nostrils on.
I turn it to show it off to my spouse and then I notice something odd.
The legs are backwards.
WHAT? How on earth could they still be backwards when I took so much time to make sure they were right and. . .
They were right.
It was the FACE that was wrong.
I had put all the facial features on the butt.
My crocodile was a butt fah-say (that's how my wife and I say "face"--fah-say, it's classier that way).
So I spent the next ten minutes doing a fac-ectomy on my christmas crocodile's butt.
This is why I shouldn't sew after 10 p.m.
Monday, August 20, 2012
Random Happenings
I'm irked that I haven't accomplished more in the way of craftyness lately.
Last week I did manage to make three new ewoks and did take some pics intending to do a tutorial but once I looked back at the pics they were garbage so I think I'm going to scrap a full tutorial and do a modified one (once I get the rest of the ewoks made). A link to the original tutorial (that has great pics) and then my tips/tricks added on (and pics of different versions of ewoks). But that might be a while because. . .
I haven't finished my patchwork crocodile yet. As I tend to do, I abandoned it just as it was getting close to completion. I made the patchwork and cut out all the pattern pieces and even got the eye pieces stitched together but that's where I stalled. So no more ewoks until I finish it. BUT. . .
I may have to bump the crocodile back for just a quick bit while I whip up the two commission sock monkeys. I went through my sock stash and had two pairs (out of 4 total in my stash) that were good to go. (one other pair is larger, so I couldn't use it for this--need these two monkeys to be the same size and the fourth pair of socks had fading on them, so they're not good enough for a sale monkey--they also came from a trip to Beale Street in Memphis, TN so I'm not keen to give them away for a sale, I want them for me).
But the crocodile won't take long to finish and I think I'll be very pleased with myself if I do get it done, so I'm leaning toward doing it first then moving on to the monkeys (I could do all three items this week and weekend, no problem).
AND, I aslo joined that charm square swap group. So when that fabric shows up I need to cut it all up which means I'll have to study some tutorials and then worry I'll screw it up then finally do it and have no issues and then laugh at myself for being such a worry wort.
AND AND AND, I also won a "traveling stash" box. So when that arrives I'll have to make an official post about it (to show it off and offer up a giveaway for the next taker) and then keep it moving on its merry way.
DAMN, huh? I have a lot of stuff going on crafty/creative wise.
And of course, I'm actually busy at my job so I don't have big stretches of free time to spend goofing off on the internet. So I have to really PLAN when I'll post stuff. That's not really a "bad" thing but just different which makes it a nuisance (while I'm getting used to it).
Ok. . .I'm thinking tonight I'll tackle either the monkeys or the crocodile. No other projects allowed until those three are DONE. (unless I want to cut up that fabric--but there's really no rush on that just yet).
Friday, August 17, 2012
Commissions: Back to my roots
Yesterday (as I was actually trying to work at work--gasp! no!) I was approached with a work related question that quickly morphed into a new commission.
A commission that takes me back to my roots.
SOCK MONKEYS!!
I love sock monkeys. They're cute but oddly weird looking (which you can play up or down, so versatile!) but more importantly they are EASY!
The ease probably comes from having made so many over my crafting history. And let me just say, those first ones (completely hand sewn) aren't exactly "good enough" to sell to anyone.
I was tasked with making FOUR monkeys. The only instructions/requests were "classic" in look (meaning Rockford Red Heel socks) and "baby safe" (so no button eyes). Two are needed as soon as I can make them and the other two can wait a bit (since they are for babies still in the womb).
I'm pretty excited about this because it will give me a chance to try out the ballpoint needles I bought to make my sister's easter sheep. I've made monkeys on the machine using a regular needle and had no issues so it will be fun to see if the ballpoint needle makes any real difference (I think I'll use a zig zag stitch too--I think older monkeys had a straight stitch).
So, we'll see what MORE KNOWLEDGE does for the finished products.
Now, to go hunt down my sock stash and see what I have on hand. . .
(oh, and while I'm talking commissions, the giant squid might be moving to stage two shortly--I'm working with the buyer on money issues, so hopefully they'll have the supply fee scraped together so I can buy the fabric and start on it).
Oh, there will be pics once I get these monkeys stitched up.
Wednesday, August 15, 2012
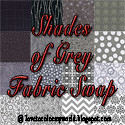
Color My World Fabric Swap!
This is a new thing for me but trying out new things is good, right?
(man, I hope so).
Anyway, I joined a charm square fabric swap over at Color My World.
The theme is Shades of Grey and yes it's a reference (of sorts) to *that* book that has ladies everywhere enjoying a good one-handed read. (nothing wrong with that ladies and gents--just wash your hands when you're done!)
Now I'm just about allergic to hyped up reading trends (never got into any of them and I despise that whole Oprah Book Club thing) but the idea of a charm square fabric swap does appeal to me.
First up, it will give me a chance to practice my cutting (so I'll have to buy a bit extra fabric in case I make a mistake--you know I will!). Second, it gives me an excuse to buy fabric. Love that (and I'm getting ready to make a large-ish purchase so I can add this yardage to that--love double dipping). Third, it'll help me get a nice charm square stash built up (so I won't have to cut all my own later).
But what appeals to me the most is the randomness of it all. Yes, there's a flickr post where we share what we bought (to reduce/prevent duplicates) so it's not a pure mystery but it still has that great grab bag feel. I love that.
Summary of details:
Open to 56 participants (openings still available).
U.S. only
Must prepare 56 charm squares.
Must provide SASE (when you send your charms to the organizer) so you can get your pack back.
Of course, I crunched the numbers before I decided to participate and I think the cost (about $25 total, that's for my yardage and the to and fro shipping) is acceptable. Yes, it's higher than an average charm pack (which go for about $10) but it's worth the slightly higher cost for the novelty of it all.
And if the worst case scenario happens (and I get totally ripped off--like I get NO pack or whatever) I'm not out that much either. (not that I think that will happen but you have to admit it could happen)
We'll see how it all goes. So far a few folks have shared pics of the fabric they're sending and I see no duds. And (of course) I plan to find some funky/fun fabric to liven up the pack (I've found a few that I'm currently debating!).
OH and I'll show off the button for it (since I can).
 "/>
"/>
(man, I hope so).
Anyway, I joined a charm square fabric swap over at Color My World.
The theme is Shades of Grey and yes it's a reference (of sorts) to *that* book that has ladies everywhere enjoying a good one-handed read. (nothing wrong with that ladies and gents--just wash your hands when you're done!)
Now I'm just about allergic to hyped up reading trends (never got into any of them and I despise that whole Oprah Book Club thing) but the idea of a charm square fabric swap does appeal to me.
First up, it will give me a chance to practice my cutting (so I'll have to buy a bit extra fabric in case I make a mistake--you know I will!). Second, it gives me an excuse to buy fabric. Love that (and I'm getting ready to make a large-ish purchase so I can add this yardage to that--love double dipping). Third, it'll help me get a nice charm square stash built up (so I won't have to cut all my own later).
But what appeals to me the most is the randomness of it all. Yes, there's a flickr post where we share what we bought (to reduce/prevent duplicates) so it's not a pure mystery but it still has that great grab bag feel. I love that.
Summary of details:
Open to 56 participants (openings still available).
U.S. only
Must prepare 56 charm squares.
Must provide SASE (when you send your charms to the organizer) so you can get your pack back.
Of course, I crunched the numbers before I decided to participate and I think the cost (about $25 total, that's for my yardage and the to and fro shipping) is acceptable. Yes, it's higher than an average charm pack (which go for about $10) but it's worth the slightly higher cost for the novelty of it all.
And if the worst case scenario happens (and I get totally ripped off--like I get NO pack or whatever) I'm not out that much either. (not that I think that will happen but you have to admit it could happen)
We'll see how it all goes. So far a few folks have shared pics of the fabric they're sending and I see no duds. And (of course) I plan to find some funky/fun fabric to liven up the pack (I've found a few that I'm currently debating!).
OH and I'll show off the button for it (since I can).
"/>Monday, August 13, 2012
Crafting for Charity: BIG FAT SUCCESS!!
BIG FAT CHARITY SUCCESS!!!
Can I get a woot woot!!
I'm so excited to announce all seven items I offered for the Regretsy Charity Sale (go HERE if you want to check out what might be left or to donate cold hard cash) sold. And it looks like they sold pretty quickly which is a double bonus. And, the sale was going so well the organizers had a second round of submissions to keep the store going for a bit longer (I think the final donated item total was around 300 items--holy crap, folks are just so generous!).
Triple bonus? There were comments (on the Regretsy facebook page) that folks wanted to get an Ewok but were beat to the punch. So I'm thinking they'd be a good item to whip up for the next sale (whenever that may be).
To keep the good karma going, I shared the Wild Olive pattern link with the folks lamenting their loss on facebook and I plan to add a little "find the pattern here:" card along with the items when I ship. (and the same applies to the peen turtle--little card saying where you can get the pattern to make your own--turtle pattern HERE --along the right hand side)
AND, I'm going to work up a little tutorial to help super beginner sewists make their own. The pattern is already very beginner friendly but I'd like to show folks that the pattern is super flexible, so even if you don't have a machine or know how to use a machine you can make one AND have it turn out cute.
(I know I hate it when I think I can make something and then when I do it's not a cute as the tutorial).
So, in the next few days I'll whip up a tutorial showing how to make one both on the machine and by hand using two different fabrics for different results all of which are very cute and worth the effort (which is minimal).
My one regret (if you can call it that) is that I didn't make MORE things to share. I have a lot of things made but I just didn't feel they were "good enough" to ask folks to buy. They are all nice but they are first results from trying out new patterns so they do have flaws (probably not noticable to everyone but noticable to me). So I need to re-visit patterns I've made before and make some really nice finished products to hold in reserver for future sales.
But first, that tutorial. And who knows. Maybe the products of the tutorial will end up as a giveaway! A kind of "thanks to everyone who helps others" dealie.
Yeah, I'm very excited about all of this.
What has you excited?
Monday, August 6, 2012
Geeky Squid
So I'm a bit squid obsessed lately. The commission is on the back burner for a few weeks (while the buyer gets the cash together) which is no problem with me. It means I'm off the hook and can get back to my own stuff for a bit.
But what?
Well, I had squid on the brain so. . .

Meet Clyde.
See, I'm a little antsy about going balls to the walls with the giant squid without really TESTING the pattern ahead of time. BUT, I don't really want to invest in the fabric to make a test giant squid (and then what would I do with it after I made it--though I'm sure it would be fabulous up on one of my guest beds). So what about a MEDIUM sized one?

Looks like Violetta really likes him (see her caressing his head so lovingly!).
I used the measurements in the original tutorial (after adding a seam allowance) but just halved them. I'm very happy with the results. If I ever made another I'd probably re-draft the head fins to make hem a bit more like Violettas (bigger at the base). I'm not unhappy with Clyde's fins but I think bigger would be even better.
And I got to use up almost all of the yard of Pac-Man fabric I bought (and then wondered what the heck I'd use it for). The undersides of the legs are made from a half yard of fabric I bought at the same time. I cut the under-legs against the grain and am happy to report it didn't effect the finished product at all. No weird stretching or warping once stitched and stuffed. And the legs are stuffed pretty tightly (except at the very top where they attach to the body).
The eyes are made from one green charm square and half of a blue one and some quick embroidery. I also got to try out some fusing stuff I bought. The fusing stuff was easy to use and worked great. But I think I bought the wrong version. The version I have is for sewing. So you apply it to the top piece of fabric (the applique image part) and then fuse it to the base fabric THEN stitch over the whole work. But that wasn't going to work since I couldn't iron onto the finished squid. So I added the fusing stuff to the blue fabric (then embroidered). Then I fused the blue to the green. Then to stablize the green I put a piece of fusing onto the green and attached it to another green then cut out the circle. There was next to no fraying as I stitched the eyes to the finished product. Kind of an ass backwards way to do it but it worked (and didn't use a lot of fusing) so I'm happy.
Now I have THREE sizes of squid.
For my own reference (though I do take commissions):
Small: $40
Medium: $100 ($80 + $20 supply fee)
Large: $160 ($100 + $60 supply fee) (estimated)
Prices do not include shipping.
Supplies needed/notes:
Small: only available in felt, completely hand stitched
Medium and large: only available in quilting cottons. Supply quotes based on $10/yard. Medium: 1.5 yards required and $5 stuffing. Large: 6 yards (estimated), $10 stuffing (estimated).
Buyers must pay supply fee up front. Supply fee is non-refundable once supplies purchased. (buyer can provide own fabric in yardages listed, then supplies fee will be stuffing fees only). Buyer can request left over fabric be returned with finished product (scraps and yardage).
Shipping fees quoted after item is finished.
OH and if you scroll on down to the bottom of my blog (and along the side) you can see all the fabulous places I show off stuff I've made (including the brand new button added for Quilt Story's Fabric Tuesday).
Wednesday, August 1, 2012
Mighty Mice!
(and I continue to bomb my blog with new stuff!)
I'm so excited about this pair I could scream.
EEEEKKK, a mouse. (or two!)

Meet T.P. Day and Mr. Durr.
Ok, I'm going to sound like one of those nutty parents who shoves pics of their new baby in your face and goes on and on about how cute they are and how they're the smartest and most gifted spawn in the world.


But aren't my new babies just the cutest and most special babies in the whole WORLD. I just know they will find cures to all the major diseases and win olympic medals and just be the gosh darn bestest babies in the whole gee-golly world!
Ok, I'll stop with that joke (it's dead, I know).
And yes, I'm all "crazy parent" because they are Orignail Patterns. Well, not really "patterns" since there are no patterns. I just made them up as I went.
See, that's the best part about working with felted sweaters. You just wait for the creation to pop out at you (well, at least I do). I buy the sweater based on the color or pattern or fiber content (and price, I like them cheap) but not with a set idea in mind. They're just potential for the sake of potential.
Itchy potential.
These mice were made from part of a 100% wool sweater (the one I scored a few weeks ago at the thrift) and I was itching like MAD working with it. I made the mistake of tossing it over my arm while I was cutting. Bad idea. With wool it's better to let it touch the least amount of skin as possible (and my hands don't get very itchy compared to my arms).

The face/head area is made from the button hole section of the sweater (and might I note, it had some really nice buttons that are pretty on both sides--saving them for future use). The button hole area was doubled over but not completely sewn down along the edge. It was only connected by the actual button holes (and along the top and bottom ribbing). So even after felting it, the two layers were still separate and when I bent them up a bit (pushing two adjacent button holes together) it made a head shape (with the holes as the ears).
At first I thought it would become a fox. The face shape was right and the ears were good (if cut pointy) but when I began body work it just wasn't going to pan out.

The head and body are one continuous piece. To get a good fox (in a normal four paws on the ground pose) I would have had to make the head and body separate pieces which I'm convinced would have compromised the shape of the bottom of the chin (and I didn't want to lose that cute face shape at all).
Clearly the buttonholes weren't meant to be foxes because they are super fabulous mice (sitting up on their rumps).
That picture shows the stitching along the back. I used a ladder stitch with a few well placed whip stitches here and there (mostly where a lot of fabric was joining, to reinforce). Gotta love felted wool. So forgiving.
The bottom of the rump is a separate bitty circle piece so they would sit flat (and they do sit super well, not top heavy at all which makes me very happy).

The arms, legs, and tails are seams from different spots inside the sweater (the sweater is so funky now, with a bunch of the seams missing--it's like a funky cape). The tails were naturally curly like that, but for the legs I just rolled the seam up on itself and left the end sticking out for the foot. The arms are just straight seams.
It's obvious I'm super proud of these. I just love when random one of a kind (or in this case, two of a kind) items pop up like this. It makes me want to run out to the thrift and buy up every natural fiber sweater I can find and go nuts.
I think there might still be a monster lurking in the remaining button holes. The two holes at the bottom of the sweater are very close set and when turned on their side resemble (at least to me) Ooogie Boogie's eyes (from Nightmare Before Christmas).
But I need a break from the itchiness for now (and I need to work on the giant squid project).
Let's hear it for upcycling!
First Patchwork Project: Reversible Drawstring Bag
Finally I'm getting around to sharing this (I've had it done for at least a week).
First, a link to the FREE TUTORIAL I used. That's a very good tutorial which I'm very happy to add to my pattern binder (did I mention I organized my patterns and put them in a binder--yea for organization!).
I'm also happy with my results.

That's the inside of the bag (hey, show the boring side first!). I've had that fat quarter for a while (it was just one of those cheap quarters you find at craft stores--it was so cute I couldn't resist it). I used the same fabric on both sides (same goofy cats).
Now. . .the cool side.


I used the same fabrics for all but one set of patches (the solid colors are different because they were scraps that were already about the right size and I didn't want to cut into a bigger scrap piece to get two of the same).
This is a great little project for scraps. I used scraps from my packs and then cut into some of my larger sized remnants. And two of the patches (the one with the goofy guy and the one with the embroidery hoop) are TRUE scraps. They are the sewing instructions from the Spoonflower embroidered dolls. I love that I was able to use them (and still have a few cute images I can use for other patchwork projects).
Normally I'm not overly thrilled by the pattern cutting phase of a project but patchwork is the exception. While it took me a bit of time to get it all cut (I'm a super newbie) I did enjoy the process. I even liked the sewing and ironing part (and bought an ironing board and replaced my broken iron so I could make this--well, and to iron clothes I guess--yeah right, I don't iron clothes!).
I'm thinking of altering the dimensions a bit to make a larger bag with bigger patches. I think I might make one of these for my sister (using the Lorax fabric I already bought).
I just need to get some craft cord. When I went to Joanne's to get some they didn't have enough in stock. So for now I used kitchen twine (looks awful) just so I could hang it to take the photos (and get the feel of how to thread a cord). I might also make the cord tube area a tiny bit wider on future ones.
Work in Progress: Giant Squid
I have a new commission in the works and I've been dragging my feet on one key element.
Drafting a rather large pattern. (based on THIS free tutorial)
I was a bit worried a mix of things would happen. Either I'd manage to do it but it would be such a hassle it would sour me on the whole project OR I would just plain out fail.
I'm happy to report I was wrong on both fronts.
And I'm also happy to report I got the whole thing drafted in about two hours and I'm really pleased with the result.

The pictures are rough, I know. It's an awkward thing to photograph (but I'm happy to report I now have better lighting in my living room--amazing what having a good bulb in all three fixtures will do for you, huh?)
For reference, that line next to it (above the white sheet of paper) is a three foot long metal ruler. So this bugger is BIG.

That's just the head portion. It's three parts. The head, a bottom ring (that attaches the legs to the main head portion), and a fin that attaches to the top of the head (the finished product will have a fin on each side of the head).
I'm very pleased with the overall shape of each element. The only two parts I need to give a little more attention to are the easier elements. The bottom ring (pictured) is a bit too small. I measured it wrong. But it's only a rectangle, so re making it won't be hard (and I could always just cut the fabric directly given the measurements I don't really "need" a pattern piece for a big rectangle). I also need to re work the circle piece (that closes off the head/ring portion). The one I cut is more oval than circle. If I use a compass to make the next one it should turn out better.
I'm also pleased that I remembered to add a 1/4 inch seam allowance to the measurments given in the tutorial. The tutorial doesn't give much instruction on the pattern drafting and has the dubious advice to "cut around the pattern leaving extra on the sides". Uh, no, that's not a true seam allowance. (but in defense of the tutorial, they used felt for their squid so you can get away with more fast and loose pattern cutting when working with felt, especially if you're going to sew and turn felt, not sew on top).
Now that I have the pattern ready, I'm super excited for the next step. FABRIC SELECTION. I'm going to give the buyer the choice to either buy what they want and ship it directly to me or I'll provide a set fabric/supplies quote and I'll buy the fabric I want. I think they'll prefer I buy what I think is best which makes me very happy. I'm toying with a brightish green batik for the main parts and a complimentary circle print for the undersides of the tentacles (to mimic suckers). I've estimated the yardage at 5 total, so I think a fabric/supplies budget of $50 is resonable (that covers fabric with shipping and the five pound box of stuffing needed--I already bought the stuffing when I was able to get it half priced using a Joanne's coupon--even if the project falls through I'll eventually use it).
A question for anyone reading:
What would you charge for the construction of a item this large? (not including the aforementioned supply budget and shipping).
I'm not looking to make a "living wage" off this but I do want to be fairly compensated (I have a number in my head but I'm curious what others think).
Subscribe to:
Posts (Atom)