Showing posts with label crafting for charity. Show all posts
Monday, June 19, 2017
Gone to the. . .rhinos?
Yes, rhino.
A co-worker hit me up to make something for a charity event she was doing (to benefit a rhino sanctuary). She wanted a chameleon (she'd seen them before. . .yes, I like to show off stuff at work, I'm so vain) but I had a memory of Jodie (Ric-Rac) having a rhino pattern.
I was right, she did but she didn't have the one I remembered (it was YEARS ago) up in her shop. So I emailed her and she hooked me up with her Dozer pattern because she's a super nice woman. (she's also the maker of the chameleon pattern. . .her stuff is so wonderful).
So I whipped up a Dozer for the rhino charity.
(side bar: how many times have I typed 'rhino' incorrectly. . .almost every time so far. . .what is that about? some words just will not be typed properly. . .but I digress)
Rhino and chameleon in a race to see who's cuter. PHOTO FINISH!
The winner is. . .
EUGENE! Photobombs always win. He's looking all scowly, too, which I know darn well is not how he is. He's an epic dude bro with a very pleasant disposition. But he is a cat so he is naturally given to stank face.
Hmm, now that I'm typing this up I realize I didn't ask my co-worker how her event planning is going (I think it happens at the end of the month. . .I'm not planning to attend, making something for one of the raffle baskets gets me out of having to actually GO, which pleases me immensely.)
I've been up to other shenanigans, too. Let me just type those posts up now. Give me a sec.
Friday, May 19, 2017
Fluff Project UPDATE!!
That there is my happy face at finally getting this latest round of Fluff sewing DONE.
It's also my happy face at having changed the way I'm doing my charity sewing (just a wee change). Instead of trying to make a set number of items per month, I'm just going to aim to for one huge total for the year.
My previous goal was 10 items per month, which brings the yearly total to 120. I'm going to up that to 150 items total for the year and do away with the "monthly" thing. That way I don't feel the odd pressure I feel (yeah, that sounds dumb, I know) when I fall behind and am still working on X month when it's now Z month.
It also frees me up to share the charity items with whatever charity comes along. Fluff Project will always be my number one outlet for the stuffed toys I make (and I'm dedicated to 60 items per year minimum for them no matter what) but I like sharing the love. That and Dolls of Hope contacted me over Instagram letting me know they're all about the handmade dolls/bears for their charity work and I like the message they're putting out there and they have two particular patterns they make which made deciding what to make a no-brainer (remember, I am lazy).
Blah, blah, me rambling about how I've been a slow poke with my sewing. . .get on with the pictures, right!
Ok. . .you're right. Pics or it didn't happen.
BOOM, in your face with 32 two items.
UGH! That's me thrusting my pelvis in the direction of those babies and bears and being ever so modest and composed and. . .yeah, you know I like to show off my stuff and that's a big fat buttload of stuff I finally finished. (and why the whole "X per month" thing was making me uptight when it took a lot longer to churn these out then I wanted).
BABIES!!!! A veritable United Colors of Benetton of babies right there.
Four different shades, none of which is "super light" because those pale ass babies show too much stains/dirt marks. Yes, I just typed that out but it's true. These babies are going to kids in refugee camps (among other places) and darker fabrics will fair better. Oh, and it's also NICE to make ALL skin tones so kids can find a baby that matches them (if they want) or maybe they just WANT a baby that doesn't look like them because they think that baby is pretty/cute. I feel you on that one, I'm a particular fan of the darker skin baby with the orange hair there on the left of the pic. That's a groovy combo if I do say so myself.
Honestly, I really like the darker face shades because they're more forgiving when it comes to the marking pens I use to draw in the faces (for the embroidery). The lighter fabrics tend to cling to the ink (even though it's disappearing or air/water soluble) and you can get ghost images if you veer off course when embroidering. And my ass veers off course all the damn time.
What goes perfectly with infants?
Why predators, of course.
Buncha bears. Grrr!
Have I mentioned lately how much I LOVE picking out fabrics for projects. It's my favorite step and these bears were extra fun because they don't have to be "realistic" (like the baby faces need to be). Purple bear? SURE! Chartreuse? HELL YES. I love chartreuse so much I know how to properly spell it without having to double check. That is LOVE right there, folks.
The one thing I noticed about the bears (which amuses me to no end) is they get busty as you stuff them. I had to mash them around a lot so they all didn't end up looking like Dolly Parton. Though a Dolly bear would be fabulous (but I don't know I'd want to work with glittery fabric or deal with the wigs. . .holy crap, the wigs!)
OH, and shout out to the Care Bear fabric. Some very kind person on swapbot (sorry, I forget who they are now. . .it was a long time ago) gave me that fabric as an extra in a swap we were in. Out of nowhere they just wanted me to have YARDAGE of this super adorable Care Bear fabric because they knew I sewed stuffed toys for charity. SEE. .. .that is kindness in action right there. It had to be a yard and a half to two yards (it was a big ole piece) and I got a ton of items out of it and I think there's still a good piece left. It was just so perfect for the babies in particular and I'm grateful to that nice person for their kindness.
Be kind to others and make the world a better place, folks. It's not that hard to do and you'll get a rush out of it. Really, you will.
Friday, July 8, 2016
Quilts for Pulse Blocks
After the Pulse nightclub massacre (side note, that was a hate crime not some terrorism b.s. I get so miffed when the news tries to make it into a "ooh, big bad brown terrorists!" thing when it was just a straight up homegrown hate crime. .. ok, mini rant over) the Orlando Modern Quilt Guild put out a call for quilts/tops/blocks to make quilts for survivors, family members, first responders, and those affected.
Details HERE.
They wanted to keep a heart/rainbow theme and offer THIS pattern as a jumping off point for folks (they'll take any quilt/top/blocks that are heart/rainbow, though). (they prefer the 10 inch size of that block)
Seeing how easy the block was AND that it could be made from scrap sizes of fabric, I was TOTALLY in.
I just mailed these 13 blocks out today.
You can get three of these blocks (the color part) from one FQ. So there are three of each of these. I did go and buy a bit of fabric for this project. I don't have a lot of true white on white fabric (I have low volume but a lot of it is black on white or gray on white) and when I found a white heart on white background fabric at Equilter AND I got a $10 gift certificate for doing a survey I figured what the hell. I only ended up paying 93 cents for a half yard of fabric. Hell yes! (and there was a 5 inch strip left that I can keep for me. .. yes, it always ends up being about me).
Used scraps for these three. So I got one purple, two green, and one pink. One of the greens has a different light fabric. I didn't have enough of the two light fabrics I used (the heart print and this other print I bought to use in a cat themed quilt and/or have just to have some white on white fabric). Again, I ended up still having a five inch strip left of the non-heart light fabric, which is perfect because the project I was thinking of using it for calls for five inch charms. I love when things work out like that.
I only have one each of these. The star fabric there just wasn't enough to make another block (which was a shame because that's sparkly and sparkly is the best) and the ostriches I didn't have enough of the heart/light fabric to make another (I have a bunch of that ostrich print because it's awesome).
Just had to enbiggen that there ostrich block to show it off a bit more. I just love it! You can see the heart print, too. I think I have to get a bit more of that fabric the next time I shop. See how easy this block was (the only tiny tricky bit is, if you're working with a directional print you have to pay attention that it's sewn on properly. .. but that applies pretty much any time you use a directional print) I kind of want to use it to make a cat themed quilt. I already have a pattern to make a much larger heart (that's what I'm using to make my Pets on Quilts submission) but this would be cool, too. And show off my funky cat fabrics a lot better since the heart uses more of each fabric (the other pattern uses 5 inch charms so each fabric has less space to pop).
That's what's up next, the Pets on Quilts submission. I need to sash the blocks, get my backing fabric, and put it together. Chop, chop.
Details HERE.
They wanted to keep a heart/rainbow theme and offer THIS pattern as a jumping off point for folks (they'll take any quilt/top/blocks that are heart/rainbow, though). (they prefer the 10 inch size of that block)
Seeing how easy the block was AND that it could be made from scrap sizes of fabric, I was TOTALLY in.
I just mailed these 13 blocks out today.
You can get three of these blocks (the color part) from one FQ. So there are three of each of these. I did go and buy a bit of fabric for this project. I don't have a lot of true white on white fabric (I have low volume but a lot of it is black on white or gray on white) and when I found a white heart on white background fabric at Equilter AND I got a $10 gift certificate for doing a survey I figured what the hell. I only ended up paying 93 cents for a half yard of fabric. Hell yes! (and there was a 5 inch strip left that I can keep for me. .. yes, it always ends up being about me).
Used scraps for these three. So I got one purple, two green, and one pink. One of the greens has a different light fabric. I didn't have enough of the two light fabrics I used (the heart print and this other print I bought to use in a cat themed quilt and/or have just to have some white on white fabric). Again, I ended up still having a five inch strip left of the non-heart light fabric, which is perfect because the project I was thinking of using it for calls for five inch charms. I love when things work out like that.
I only have one each of these. The star fabric there just wasn't enough to make another block (which was a shame because that's sparkly and sparkly is the best) and the ostriches I didn't have enough of the heart/light fabric to make another (I have a bunch of that ostrich print because it's awesome).
Just had to enbiggen that there ostrich block to show it off a bit more. I just love it! You can see the heart print, too. I think I have to get a bit more of that fabric the next time I shop. See how easy this block was (the only tiny tricky bit is, if you're working with a directional print you have to pay attention that it's sewn on properly. .. but that applies pretty much any time you use a directional print) I kind of want to use it to make a cat themed quilt. I already have a pattern to make a much larger heart (that's what I'm using to make my Pets on Quilts submission) but this would be cool, too. And show off my funky cat fabrics a lot better since the heart uses more of each fabric (the other pattern uses 5 inch charms so each fabric has less space to pop).
That's what's up next, the Pets on Quilts submission. I need to sash the blocks, get my backing fabric, and put it together. Chop, chop.
Monday, November 30, 2015
2015 Fluff Project Goal: MET!!
I just wanted to make this official (even though I know I showed these items off before).
I MET MY 2015 FLUFF PROJECT YEARLY GOAL
I set out to make a minimum of 5 items each month and a week ago (or so) I mailed out two bags of items which marked the completion of my 2015 bare minimum goal.
I got back up mailing stuff out but those two pics show my quota (plus a few extras) for September, October, November, and December.
I feel like I cheated for December because I made the pickles and they were SUPER easy, so I'm working on a few more (more involved) items for December. I have three gingerbread men in progress right now so I want to (at bare minimum) get them done by the end of the year. Then I'm going to make a Fluff Project year in review post and give a grand total (I know it's over quota a bit but not a ton).
I'm also hoping to get a few of the Ric Rac guinea pig pattern guinea pigs done for Fluff for December, too. I'm set to make a pair for my friend's girls but if the pattern proves too fussy, I'm not going to push to get some made for Fluff (for this year). I'll save the pattern and make a few for Fluff next year.
I have so many patterns I want to get to making, I'll have plenty to keep me busy for 2016. (lots of Dolls and Daydreams patterns. . .they just had a sale and I snagged three more patterns from that).
I MET MY 2015 FLUFF PROJECT YEARLY GOAL
I set out to make a minimum of 5 items each month and a week ago (or so) I mailed out two bags of items which marked the completion of my 2015 bare minimum goal.
I got back up mailing stuff out but those two pics show my quota (plus a few extras) for September, October, November, and December.
I feel like I cheated for December because I made the pickles and they were SUPER easy, so I'm working on a few more (more involved) items for December. I have three gingerbread men in progress right now so I want to (at bare minimum) get them done by the end of the year. Then I'm going to make a Fluff Project year in review post and give a grand total (I know it's over quota a bit but not a ton).
I'm also hoping to get a few of the Ric Rac guinea pig pattern guinea pigs done for Fluff for December, too. I'm set to make a pair for my friend's girls but if the pattern proves too fussy, I'm not going to push to get some made for Fluff (for this year). I'll save the pattern and make a few for Fluff next year.
I have so many patterns I want to get to making, I'll have plenty to keep me busy for 2016. (lots of Dolls and Daydreams patterns. . .they just had a sale and I snagged three more patterns from that).
2015 Softies for Mirabel: FINISHED
I mailed them out this morning and had been showing them off as I went (on instagram @madameugly) so now I'm making one big fat post about them.
THIRTY FIVE items.
Yes, I'm totally bragging and I don't care. I'm damn proud that I set myself to producing a nice amount of toys (didn't set a number but I wanted it to be at least double digits) and I met it. I treated this like a job but not in the boring torture yourself sense of the word and just LOOK what I was able to do. Totally showed me how much time I piss away sitting in front of the t.v. (and this did not impact my t.v. watching at all, I still sat on my fat ass and watched a ton of t.v. but not quite as much as I normally do).
Ok, we need detailed pics.
12 snails.
I've made this pattern before for the Fluff Project (and might have even shown these off here as an in-progress pic). The pattern is a free one I found online and I just picked through my stash to find the cutest fabrics (most of which were scrap sized). This pattern is SUPER easy even though it looks fussy (the eye horns look tricky but really aren't, though you do need to go super slow when you sew them. . .I even turn the sewing machine wheel by hand for them just so they turn out really nice). My biggest tip for this pattern? DO NOT cut out both pieces (for body and shell) and then try to sew them together. Trace the pattern once and then sew on the line (into two layers of right sides facing fabric). Then cut out the sewn fabric (with pinking shears). It's really the only way to do those eye horns and get a nice curl on the shell. Also, leave extra on the opening of the shell. You can always fold it up inside and crease it with your fingernail so you get a nice edge to do your ladder stitch.
7 pickles.
Only six are pictured since I'm recycling a photo. I made 13 of these total and split them between Fluff and Mirabel (with mirabel getting the "test" one that turned out perfect). I used fleece for these, the fleece that has the little raised fuzzy bumps. I got it from the remnant bin. The pattern is a free one from Abby Glassenberg (I used three of her patterns for this box of softies). The original pattern is calls for felt for the body and french knots for the bumps (and felt eyes). I used really small safety eyes instead and they fit perfectly. BUT, I advise you put them on after you sew the pickle. That's kind of backwards for safety eyes, but you have to put them close to the seam and trying to sew the seam with the eye stems all poking up is annoying (I had that problem when I was making the shark pattern I made for Fluff. . and it's not that hard to put the eyes in after you sew the item but before you stuff).
5 bacon and 5 eggs.
Nothing new here. I made these for Fluff and they aren't that hard to make at all (I'm working on a tutorial for it. . .have the pics ready just need to type it up). I hesitate to even use the word "pattern" because it's THAT easy (and there really aren't any pre-made pattern pieces, you can make the pattern pieces yourself then make the toys. . .it's stupid simple in that "holy crap, how dumb is that!" way).
2 jellyfish
I made one of these for a swap before and (again) they are stupid simple. They look like an Abby Glassenberg pattern but they aren't. There's really no true pattern for these, either. Just trace something that's circular (top pieces is about an inch larger than the bottom) and assemble. They only tricky part is dealing with the tentacles. I totally ran one over while sewing the side seam and had to fix it. Annoyed the crap out of me. Big tip for these is to put the eyes in after you sew them and before you stuff. You don't "sew then turn" these so the eyes would totally be in the way as you're trying to ease the two different sized circles together while sewing (oh, and use a ballpoint needle and zig zag stitch when working with fleece).
1 flying squirrel.
Yup, totally an Abby Glassenberg free pattern (made for Wild Olive). This is a simple pattern but pay attention when doing the ears (to make sure you put them in the correct direction) and be careful when you get to where the feet are. I basted the feet to the body fabric but still accidentally caught the side of the paws (two different ones) in the seam and had to pick it out and fix it. Not a huge deal to fix but annoying (the feet are felt so totally forgiving when it comes to picking out stitches). I used a rather slick minky/low pile faux fur for this which was annoying but made for a kick ass cute finished product (so it was worth it). OH, watch the grain of your fabric with this, too. You could totally eff up the tail if you didn't mind the grain (the tail shape curves a lot). Thankfully with the faux fur there was a lay to the hair so I had to cut a certain way which matched the least amount of stretch on the fabric. (that's another thing I dislike about faux fur. . .you have to mind the pile).
I mailed this bunch out priority mail so they should totally make their destination in time (they need to be there by Saturday so I'm confident they'll make it with a bit of time to spare).
HUGE thank you to Spoonflower for taking the donations. There is no way I could have mailed 35 stuffed toys to Australia for $12-ish (don't remember the exact total, but my whole postage bill for that trip was $25 and I had this box and three big bag style envelopes, one of which went priority as well).
THIRTY FIVE items.
Yes, I'm totally bragging and I don't care. I'm damn proud that I set myself to producing a nice amount of toys (didn't set a number but I wanted it to be at least double digits) and I met it. I treated this like a job but not in the boring torture yourself sense of the word and just LOOK what I was able to do. Totally showed me how much time I piss away sitting in front of the t.v. (and this did not impact my t.v. watching at all, I still sat on my fat ass and watched a ton of t.v. but not quite as much as I normally do).
Ok, we need detailed pics.
12 snails.
I've made this pattern before for the Fluff Project (and might have even shown these off here as an in-progress pic). The pattern is a free one I found online and I just picked through my stash to find the cutest fabrics (most of which were scrap sized). This pattern is SUPER easy even though it looks fussy (the eye horns look tricky but really aren't, though you do need to go super slow when you sew them. . .I even turn the sewing machine wheel by hand for them just so they turn out really nice). My biggest tip for this pattern? DO NOT cut out both pieces (for body and shell) and then try to sew them together. Trace the pattern once and then sew on the line (into two layers of right sides facing fabric). Then cut out the sewn fabric (with pinking shears). It's really the only way to do those eye horns and get a nice curl on the shell. Also, leave extra on the opening of the shell. You can always fold it up inside and crease it with your fingernail so you get a nice edge to do your ladder stitch.
7 pickles.
Only six are pictured since I'm recycling a photo. I made 13 of these total and split them between Fluff and Mirabel (with mirabel getting the "test" one that turned out perfect). I used fleece for these, the fleece that has the little raised fuzzy bumps. I got it from the remnant bin. The pattern is a free one from Abby Glassenberg (I used three of her patterns for this box of softies). The original pattern is calls for felt for the body and french knots for the bumps (and felt eyes). I used really small safety eyes instead and they fit perfectly. BUT, I advise you put them on after you sew the pickle. That's kind of backwards for safety eyes, but you have to put them close to the seam and trying to sew the seam with the eye stems all poking up is annoying (I had that problem when I was making the shark pattern I made for Fluff. . and it's not that hard to put the eyes in after you sew the item but before you stuff).
5 bacon and 5 eggs.
Nothing new here. I made these for Fluff and they aren't that hard to make at all (I'm working on a tutorial for it. . .have the pics ready just need to type it up). I hesitate to even use the word "pattern" because it's THAT easy (and there really aren't any pre-made pattern pieces, you can make the pattern pieces yourself then make the toys. . .it's stupid simple in that "holy crap, how dumb is that!" way).
3 crabbies. That's an Abby Glassenberg pattern (and a recycled pic from the ones I made for Fluff. . .I used up all of that fabric making crabs or I would have made more than three for Mirabel.. .that pattern is easy and turns out a GREAT finished item, I used cottons instead of fleece with zero issues)
2 jellyfish
I made one of these for a swap before and (again) they are stupid simple. They look like an Abby Glassenberg pattern but they aren't. There's really no true pattern for these, either. Just trace something that's circular (top pieces is about an inch larger than the bottom) and assemble. They only tricky part is dealing with the tentacles. I totally ran one over while sewing the side seam and had to fix it. Annoyed the crap out of me. Big tip for these is to put the eyes in after you sew them and before you stuff. You don't "sew then turn" these so the eyes would totally be in the way as you're trying to ease the two different sized circles together while sewing (oh, and use a ballpoint needle and zig zag stitch when working with fleece).
1 flying squirrel.
Yup, totally an Abby Glassenberg free pattern (made for Wild Olive). This is a simple pattern but pay attention when doing the ears (to make sure you put them in the correct direction) and be careful when you get to where the feet are. I basted the feet to the body fabric but still accidentally caught the side of the paws (two different ones) in the seam and had to pick it out and fix it. Not a huge deal to fix but annoying (the feet are felt so totally forgiving when it comes to picking out stitches). I used a rather slick minky/low pile faux fur for this which was annoying but made for a kick ass cute finished product (so it was worth it). OH, watch the grain of your fabric with this, too. You could totally eff up the tail if you didn't mind the grain (the tail shape curves a lot). Thankfully with the faux fur there was a lay to the hair so I had to cut a certain way which matched the least amount of stretch on the fabric. (that's another thing I dislike about faux fur. . .you have to mind the pile).
I mailed this bunch out priority mail so they should totally make their destination in time (they need to be there by Saturday so I'm confident they'll make it with a bit of time to spare).
HUGE thank you to Spoonflower for taking the donations. There is no way I could have mailed 35 stuffed toys to Australia for $12-ish (don't remember the exact total, but my whole postage bill for that trip was $25 and I had this box and three big bag style envelopes, one of which went priority as well).
Monday, November 16, 2015
Sewing for Charity: Softies for Mirabel and Fluff Project (updates!)
I've kicked it into high gear to make sure I have something to send to Spoonflower for their Softies for Mirabel drive.
Here's what I have so far:
Sweet and sour pickles!
It's a free pattern courtesy of While She Naps' Abby Glassenberg. HERE.
The original pattern was for felt with french knot bumps and felt eyes. I mixed it up a bit with textured fleece/minky (got it in the remnant bin and it made 13 total pickles and there is a bit still left over--my first test pickle is not shown here but it turned out great so it's part of the donation pile)
I also subbed out small safety eyes and then did embroidered mouths.
Half dozen for Softies for Mirabel and half dozen for Fluff Project. The extra will go to Mirabel (yes, I was tempted to keep it but these are so easy to make I could make more for me any time I want so no need to keep the tester since it turned out perfect).
More pics because I can (the color is a minty green despite what these pics show--I still have horrible lighting in my kitchen and I'm too lazy to make a light box and all that shit).
Holding it in my hand to show the size. It's small but even with the small size was not hard to sew at all. The pattern is three pieces (to get the good shape) which had me worried it would be a pain to sew (more dimensional stuff can be a pain in the ass and when I want to assembly sew for charity sometimes I prefer patterns of least resistance). I was also concerned the eyes wouldn't fit but they did.
TIP: Put the eyes on after you sew the pickle but before you stuff. That's not normally how you put on safety eyes but since this sucker is small, the stems of the eyes would get in the way. And you won't have to fight with them getting too close to the edge. That's a super pain in the ass when you're making something and the safety eyes are already on and when you're trying to do the seam the eye is all in the way. No, just no. Put the mouth on after you stuff but before you close (so you can best hide the knots).
Pickles aren't the only thing I'm up to.
(I'd like to note that since I made 6 pickles for Fluff Project, technically I've met my five stuffed toys for December goal AND met my yearly goal, too. . .but I still want to make some other stuff for Fluff if possible and I've already started on something else for Fluff).
I've also been cranking out stuff JUST for Softies for Mirabel.
I got all that done this weekend. The crabs (also an Abby Glassenberg free pattern. . .I think I forgot to link it before so HERE it is--I make mine with quilting cotton not fleece but that's my only change--I just don't like fleece for small fussy pieces since it stretches a lot and annoys me).
The snail is one I've done for Fluff Project before, so the TWELVE here are all for Mirabel. I'm going to googly eye them all since I love that look. Now I just need to close the crabs (then they are DONE) and finish up the snails (close the bodies, put on eyes and mouth, and attach shell to body).
"Mom, hurry up and leave the room, I want to nose around in that scrap bin and see what I can find to eat!"
Yes, Murray likes to dine at the scrap bin buffet. Butt. I have to dump it every time I sew (or make sure there isn't anything desirable like long pieces of thread or crinkly plastic or paper or cardboard. . .you get the idea. . .in there). I can only leave a few fabric pieces (not bits, they have to be larger pieces, I like to save them to test my machine when I have to change thread) in there since that's the only thing he seems to not care about, though he'll still get up on the table and rummage about. I think he's part raccoon. OH and I have to cover everything too, especially if there are little bits cut out. If they don't actively cart them off, they'll push them off the table and play with them (meaning they get lost) or just generally get into shit. Cats, gotta love them. (or just not have them because you're never going to win with them. Never.)
Here's what I have so far:
Sweet and sour pickles!
It's a free pattern courtesy of While She Naps' Abby Glassenberg. HERE.
The original pattern was for felt with french knot bumps and felt eyes. I mixed it up a bit with textured fleece/minky (got it in the remnant bin and it made 13 total pickles and there is a bit still left over--my first test pickle is not shown here but it turned out great so it's part of the donation pile)
I also subbed out small safety eyes and then did embroidered mouths.
Half dozen for Softies for Mirabel and half dozen for Fluff Project. The extra will go to Mirabel (yes, I was tempted to keep it but these are so easy to make I could make more for me any time I want so no need to keep the tester since it turned out perfect).
More pics because I can (the color is a minty green despite what these pics show--I still have horrible lighting in my kitchen and I'm too lazy to make a light box and all that shit).
Holding it in my hand to show the size. It's small but even with the small size was not hard to sew at all. The pattern is three pieces (to get the good shape) which had me worried it would be a pain to sew (more dimensional stuff can be a pain in the ass and when I want to assembly sew for charity sometimes I prefer patterns of least resistance). I was also concerned the eyes wouldn't fit but they did.
TIP: Put the eyes on after you sew the pickle but before you stuff. That's not normally how you put on safety eyes but since this sucker is small, the stems of the eyes would get in the way. And you won't have to fight with them getting too close to the edge. That's a super pain in the ass when you're making something and the safety eyes are already on and when you're trying to do the seam the eye is all in the way. No, just no. Put the mouth on after you stuff but before you close (so you can best hide the knots).
Pickles aren't the only thing I'm up to.
(I'd like to note that since I made 6 pickles for Fluff Project, technically I've met my five stuffed toys for December goal AND met my yearly goal, too. . .but I still want to make some other stuff for Fluff if possible and I've already started on something else for Fluff).
I've also been cranking out stuff JUST for Softies for Mirabel.
I got all that done this weekend. The crabs (also an Abby Glassenberg free pattern. . .I think I forgot to link it before so HERE it is--I make mine with quilting cotton not fleece but that's my only change--I just don't like fleece for small fussy pieces since it stretches a lot and annoys me).
The snail is one I've done for Fluff Project before, so the TWELVE here are all for Mirabel. I'm going to googly eye them all since I love that look. Now I just need to close the crabs (then they are DONE) and finish up the snails (close the bodies, put on eyes and mouth, and attach shell to body).
"Mom, hurry up and leave the room, I want to nose around in that scrap bin and see what I can find to eat!"
Yes, Murray likes to dine at the scrap bin buffet. Butt. I have to dump it every time I sew (or make sure there isn't anything desirable like long pieces of thread or crinkly plastic or paper or cardboard. . .you get the idea. . .in there). I can only leave a few fabric pieces (not bits, they have to be larger pieces, I like to save them to test my machine when I have to change thread) in there since that's the only thing he seems to not care about, though he'll still get up on the table and rummage about. I think he's part raccoon. OH and I have to cover everything too, especially if there are little bits cut out. If they don't actively cart them off, they'll push them off the table and play with them (meaning they get lost) or just generally get into shit. Cats, gotta love them. (or just not have them because you're never going to win with them. Never.)
Tuesday, August 11, 2015
Fluff Project: July/August DONE
I did a double up on the Fluff Project again. July and August together.
Ladies first!
All the single ladies. . .all the single ladies!
(this is a free pattern from Blue Whimsy
Selfie time!
I wish I'd been brave enough to set the pony tail higher on more than just this blue haired gal. It's a great look. But maybe it is better that only Blue got it. It makes her extra special.
Purple was the first mermaid I finished. She's just so matchy/matchy. Very prim and proper.
Green hair is bright and fun. Her tail/body color just reminds me of goldfish.
Brown/red hair is super cute (I have a weakness for the redheads, I won't lie). It's not just her reddish/brown hair, it's her body/tail fabric.
Peek-a-boo, I see you! With just a bit of fussy cutting you get a walrus on your tail. Koo-koo-ka-chu!
NARWHAL Y'all! See why I really like my redhead girl? (and what about that wee birdy on the back of her tail, too freaking cute).
Last but not least is the fanciest of the group, Blondie.
Yeah, her fabric is styling! Look at that octopus peeking out on her tail!
There it is again on her back. Blondie looks all sweet and innocent, but piss her off and she'll unleash the kracken. LOOK OUT!
I really like this pattern. It's fairly simple and makes a nice sized toy, not too big so you can use fat quarters to make it but not so small you get annoyed sewing it by machine. My only problem (and it's mine, not the pattern) is with the light colored skin fabrics. I think I need to put some stabilizer on the back at the face to help block out the stitching. The really light fabrics show the floss tails (even when I keep the tails tiny). Live and learn on that one. (I'll have to try using a double layer of fabric or putting a stabilizer, next time)
Next up. . .snails.
Another free pattern. I've made this pattern before for a swap, so I knew it was easy. I wanted easy this time around (so I could mass produce).
These little buggers are small enough you can use scraps on them. In fact, most of the fabrics here were from my scrap bucket.
Blue shell and love snail were from scraps. The middle snail's shell was from the same fabric I used for the orange tail mermaid. It was a large scale print that looked hand dyed (might have been) and had a lot of large patches of different colors. I got it in a remnant/scrap box and it turned out to be perfect for a lot of projects.
Orange shell was from scraps (and the body was from the same fabric as green shell snail and orange tail mermaid). Guitar snail (aka Slow Hand) was from scraps (body) and some gifted fabric from Kristy (who runs the Fluff Project). Flower snail's body is scrap (yes, same as Slow Hand) and so is the shell.
I made five mermaids and six snails.
Ladies first!
All the single ladies. . .all the single ladies!
(this is a free pattern from Blue Whimsy
Selfie time!
I wish I'd been brave enough to set the pony tail higher on more than just this blue haired gal. It's a great look. But maybe it is better that only Blue got it. It makes her extra special.
Purple was the first mermaid I finished. She's just so matchy/matchy. Very prim and proper.
Green hair is bright and fun. Her tail/body color just reminds me of goldfish.
Brown/red hair is super cute (I have a weakness for the redheads, I won't lie). It's not just her reddish/brown hair, it's her body/tail fabric.
Peek-a-boo, I see you! With just a bit of fussy cutting you get a walrus on your tail. Koo-koo-ka-chu!
NARWHAL Y'all! See why I really like my redhead girl? (and what about that wee birdy on the back of her tail, too freaking cute).
Last but not least is the fanciest of the group, Blondie.
Yeah, her fabric is styling! Look at that octopus peeking out on her tail!
There it is again on her back. Blondie looks all sweet and innocent, but piss her off and she'll unleash the kracken. LOOK OUT!
I really like this pattern. It's fairly simple and makes a nice sized toy, not too big so you can use fat quarters to make it but not so small you get annoyed sewing it by machine. My only problem (and it's mine, not the pattern) is with the light colored skin fabrics. I think I need to put some stabilizer on the back at the face to help block out the stitching. The really light fabrics show the floss tails (even when I keep the tails tiny). Live and learn on that one. (I'll have to try using a double layer of fabric or putting a stabilizer, next time)
Next up. . .snails.
Another free pattern. I've made this pattern before for a swap, so I knew it was easy. I wanted easy this time around (so I could mass produce).
These little buggers are small enough you can use scraps on them. In fact, most of the fabrics here were from my scrap bucket.
Blue shell and love snail were from scraps. The middle snail's shell was from the same fabric I used for the orange tail mermaid. It was a large scale print that looked hand dyed (might have been) and had a lot of large patches of different colors. I got it in a remnant/scrap box and it turned out to be perfect for a lot of projects.
Orange shell was from scraps (and the body was from the same fabric as green shell snail and orange tail mermaid). Guitar snail (aka Slow Hand) was from scraps (body) and some gifted fabric from Kristy (who runs the Fluff Project). Flower snail's body is scrap (yes, same as Slow Hand) and so is the shell.
It's actually two different floral prints. I didn't have enough of either of them to make a full shell but they work very well together. I was worried Flower snail would look too "old lady" but once I slapped the google eyes on that feeling was long gone. Google eyes make everything fun and kiddie centric. The original pattern has the face all on the body (with the nubs as horns) but forget that noise. Snails need eyes on stalks. End of discussion. So, these snails are NOT baby safe but screw the babies. They get everything. Lets make toys for kids who know better than to gnaw on everything, right? Right! But if you're all about the babies (poo on them!) you could make this without any face at all and it would still be cute (but not as cute as google eyes, so take THAT, you spoiled "gonna choke on that!" babies).
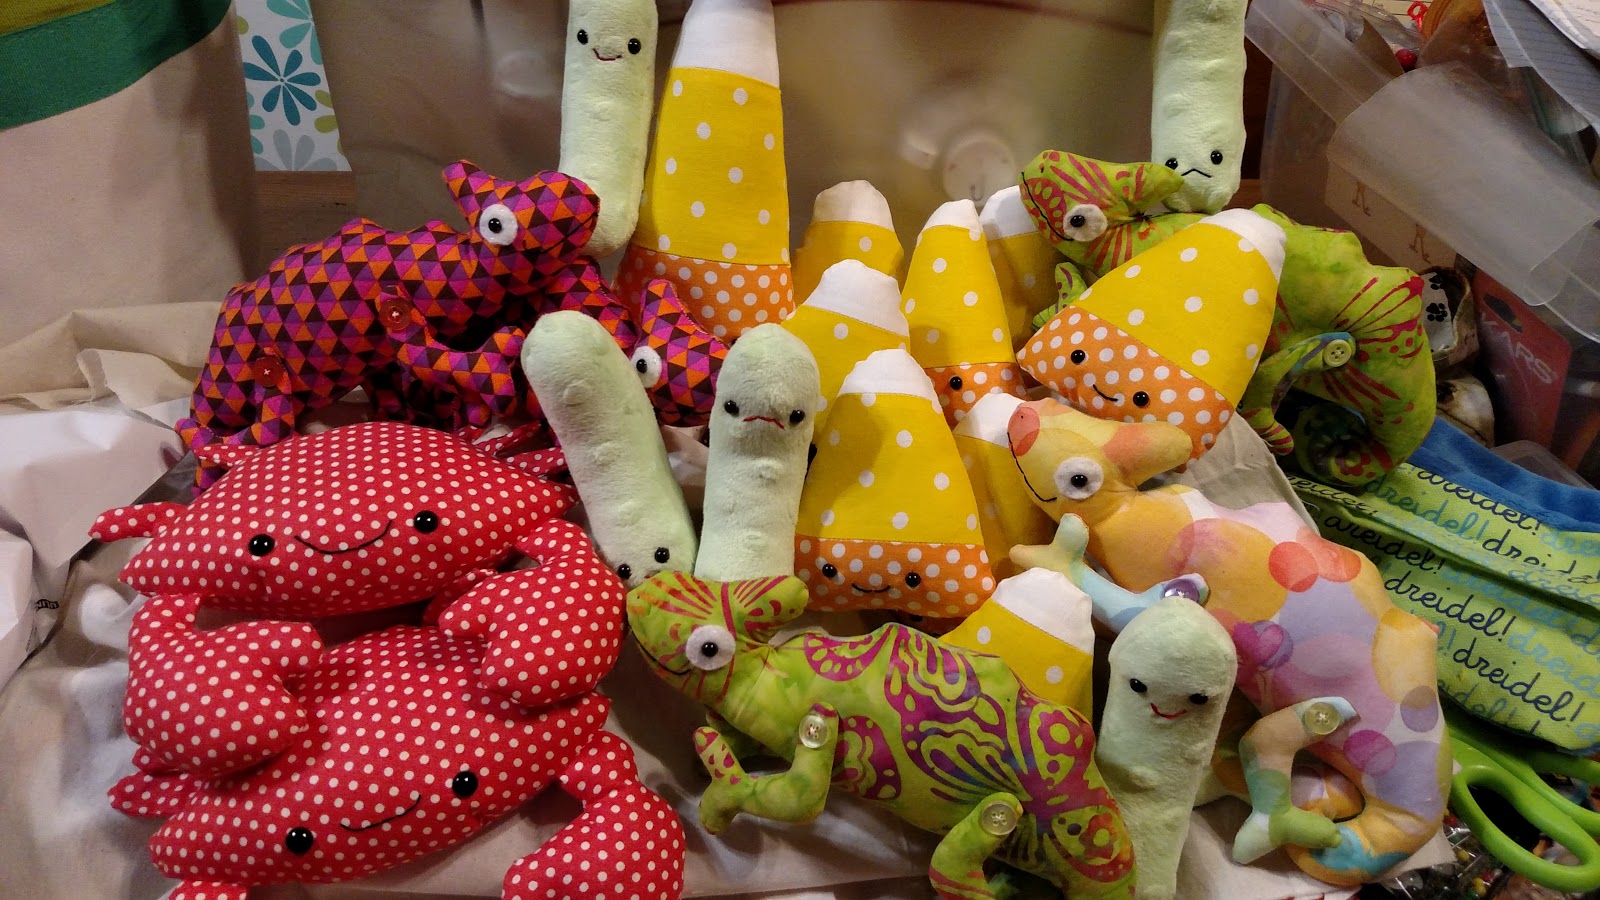
Ok, enough baby bashing (for now). What else am I up to? I'm finishing up my quilt for the Pets on Quilts contest (my cats are "helping" a lot which means I have a very hairy quilt, not that I'm worried about it, it's going to get hairy no matter what if it's in my house). Then I need to focus on some swap items (which includes an art doll where I just might paint on fabric--reading up on that process now) and then make some medical belts for my pops. That's a super boring project (what? it is!) so I'm not super interested in it. I know once I get into it I'll be interested but it's just not interesting in the beginning (and I have time sensitive items to get done first). Then I need to start thinking about the next round of Fluff items. I'm thinking candy corn and. . .crap, I forgot the other idea I had (good thing I wrote it down on my chalkboard at home). And I promise I will get that bacon and egg tutorial up someday (maybe after the quilt and a few swaps. .. so maybe this month).
Friday, June 5, 2015
Fluff Project: May/June DONE!
Guess what?
I didn't make mermaids for May/June (like I thought I was going to). So I've pushed them back to July.
BUT. . .I did get May/June done.
Bacon and eggs!
That's one big breakfast right there.
We need some portion control! (sing that to the tune of Prince's "Pussy Control". ..aaah, portion con-trol!)
Cute little sets!
Or, if you're watching the waistline, a small breakfast?
Though who really eats only ONE strip of bacon? I guess if it was as big as this bacon one would be plenty. (bacon is roughly 12 inches long or so)
Both bacon and eggs are original patterns. Super simple, too.
The eggs are just a circle (used a drinking glass to get a good circle) cut from yellow fleece. Add a face (eyes are felt, mouth is embroidery). Using the circle as a guide, free hand draw the egg white portion onto the back of the white fleece and cut out leaving a seam allowance around the drawn line. Sew the yellow circle to the cut out white part (lightly stuffing as you go). Then sew the cut white part down to another piece of fleece (right sides together). Trim and turn the whole egg right side out. Then top stitch the around the yellow circle and hand stitch the opening closed.
The bacon I had to make a template for (after I made one free hand and the fat stripes didn't line up like I wanted them too--but it still looked good but not how I wanted it to look). From cardboard I cut a wavy line. Then I used the cut off bit to make the same wave on the other side of the bacon. Then I used the cut bit of cardboard to make a fat template (so the wave on the fat would match the wave on the meat). Cut out two meat (red) and four fat (white) paying attention that you're cutting mirror images (so the waves line up properly). Top stitch two fat stripes to each meat piece. I did one side completely and then the other (so I could make sure the fats would line up as best I could). When spacing the fats, make sure you don't put them too close to the edge of the meat (don't want the fats getting caught in the seam). Pin a lot so the fats don't shift on you as you top stitch. Cut out two felt eyes and sew them to one of the two meat/fat pieces (I just pick the nicest of the pair), making sure the eyes won't get caught in the side seams. Add the mouth. Put a face side and a blank side together (right sides together) and sew leaving an opening to turn (I left the opening at either the top or bottom between the fat lines). Trim and turn right side out (making sure to roll the seams really well to get them as flat as possible so the wave shows). Pin along the fats so they line up as best as possible then top stitch down both sides of each fat wave. There will be a lot of bulk at the ends, so you can stop before the thick seam bulk if you want. Hand stitch the opening shut.
Fleece works GREAT for these. Felt would be a bit too rough and stiff. Fleece is also good price wise. You can find decent pieces in the remnant bin but even if you have to buy it it's not expensive. Felt (I like wool blend) would get pricey. I'm sure fleece has a right and wrong side but for these I like having the fuzzier side of the fleece as the "right" side. That light fuzziness adds to the cuteness a LOT.
The eggs are super fast to make. The bacon takes a bit more time (to get the fats all lined up nicely) but they're not time consuming either.
I had a first making these, too. I broke a needle. Scared the crap out of me but didn't cause any issues (just turned my machine upside down and shook the piece out).
I'd love to make more kawaii food for the Fluff Project. My sister says, "TOAST!". That would be cute (with a little pat of butter on it that has the wee face!). But toast would involve so odd sewing (sewing "walls" where you have to attach a long strip to a flat piece) which I'm not keen on fussing with right now.
I'll mail these out before I go on vacation and then I can get down to making the mermaids I said I'd make!
I didn't make mermaids for May/June (like I thought I was going to). So I've pushed them back to July.
BUT. . .I did get May/June done.
Bacon and eggs!
That's one big breakfast right there.
We need some portion control! (sing that to the tune of Prince's "Pussy Control". ..aaah, portion con-trol!)
Cute little sets!
Or, if you're watching the waistline, a small breakfast?
Though who really eats only ONE strip of bacon? I guess if it was as big as this bacon one would be plenty. (bacon is roughly 12 inches long or so)
Both bacon and eggs are original patterns. Super simple, too.
The eggs are just a circle (used a drinking glass to get a good circle) cut from yellow fleece. Add a face (eyes are felt, mouth is embroidery). Using the circle as a guide, free hand draw the egg white portion onto the back of the white fleece and cut out leaving a seam allowance around the drawn line. Sew the yellow circle to the cut out white part (lightly stuffing as you go). Then sew the cut white part down to another piece of fleece (right sides together). Trim and turn the whole egg right side out. Then top stitch the around the yellow circle and hand stitch the opening closed.
The bacon I had to make a template for (after I made one free hand and the fat stripes didn't line up like I wanted them too--but it still looked good but not how I wanted it to look). From cardboard I cut a wavy line. Then I used the cut off bit to make the same wave on the other side of the bacon. Then I used the cut bit of cardboard to make a fat template (so the wave on the fat would match the wave on the meat). Cut out two meat (red) and four fat (white) paying attention that you're cutting mirror images (so the waves line up properly). Top stitch two fat stripes to each meat piece. I did one side completely and then the other (so I could make sure the fats would line up as best I could). When spacing the fats, make sure you don't put them too close to the edge of the meat (don't want the fats getting caught in the seam). Pin a lot so the fats don't shift on you as you top stitch. Cut out two felt eyes and sew them to one of the two meat/fat pieces (I just pick the nicest of the pair), making sure the eyes won't get caught in the side seams. Add the mouth. Put a face side and a blank side together (right sides together) and sew leaving an opening to turn (I left the opening at either the top or bottom between the fat lines). Trim and turn right side out (making sure to roll the seams really well to get them as flat as possible so the wave shows). Pin along the fats so they line up as best as possible then top stitch down both sides of each fat wave. There will be a lot of bulk at the ends, so you can stop before the thick seam bulk if you want. Hand stitch the opening shut.
Fleece works GREAT for these. Felt would be a bit too rough and stiff. Fleece is also good price wise. You can find decent pieces in the remnant bin but even if you have to buy it it's not expensive. Felt (I like wool blend) would get pricey. I'm sure fleece has a right and wrong side but for these I like having the fuzzier side of the fleece as the "right" side. That light fuzziness adds to the cuteness a LOT.
The eggs are super fast to make. The bacon takes a bit more time (to get the fats all lined up nicely) but they're not time consuming either.
I had a first making these, too. I broke a needle. Scared the crap out of me but didn't cause any issues (just turned my machine upside down and shook the piece out).
I'd love to make more kawaii food for the Fluff Project. My sister says, "TOAST!". That would be cute (with a little pat of butter on it that has the wee face!). But toast would involve so odd sewing (sewing "walls" where you have to attach a long strip to a flat piece) which I'm not keen on fussing with right now.
I'll mail these out before I go on vacation and then I can get down to making the mermaids I said I'd make!
Monday, July 7, 2014
For Pinks Sakes: Quilt Blocks for Charity.
Anna at Life So Crafty did a blog hop, For Pinks Sakes. I couldn't commit to doing the blog tour (they posted on weekends and I don't "computer" much on weekends) but I did want to get in on the sewing portion of the hop.
Anna is collecting pink quilt blocks for inclusion into a charity quilt she's making to help raise breast cancer awareness AND (more importantly) funds of her mother in-law's treatment.
She's collecting any style as long as they are minimum 4 inches (finished) and contain pink fabrics. Also, square/rectangle is better.
So I decided to make some more blocks. I made one a few months ago (just a simple 2.5 inch patchwork one) but I pawed through my stash and found all the pink I had and realized I needed to make more blocks. I've been trying to bust my stash and this was PERFECT. It was also a perfect chance to try out a simple/basic block I've been wanting to try.
BLOCKS AHOY!!
Log cabin blocks for the WIN.
I made them one round smaller than the instructions I found. But these are around 10 inches in size (didn't measure, but the longest log on them is 10.5 inches so they're in that ballpark).
Those were the first two I made. I did a fussy cut cute print for the centers. I just HAD to use that piggy.
(oh, any wonkiness you see in them is because they're on a lumpy picnic table--the blocks aren't crookedy like that).
Once I made that pair I was kind of hooked. I just had to make a few more.
And since I was cutting fabric, I felt obligated to keep using the fabric, trying to use as much of the cut bits as possible. Then when one print would get low, I'd try to use it all up. It was like a game!
I tried not to duplicate the center square on any of them.
(beware, my toes are in the next pictures! these little piggies were putting the sewing machine pedal to the metal)
I ended up with a total of eight log cabin blocks.
And all kinds of little pieces left over. SO. . .I had to make two more blocks to bring the grand total up to 10.
2.5 inch charms in a nine patch style. Very basic. (again, any warbly/wonkiness is due to the surface they are on, they turned out very neat--except for one seam on each of them. It curled over and I shook my fist at it and put a pox on its home!)
They measure at about 6 inches each? I put my 5 inch square ruler on them to make sure they met the minimum size requirements and they were larger than it so I was all good.
I had so much fun making these. It was nice to do some actual quilt block making for a change.
And I realized I like the smell of hot fabric. When you're ironing (pressing--whatever) some unwashed fabrics and you get that sizing smell? Yeah, I like that a lot.
I mailed these off this morning and I hope they are of some use to Anna. Hell, even if she thinks they suck, I had fun and busted some of my stash so I'm a big winner!
Anna is collecting pink quilt blocks for inclusion into a charity quilt she's making to help raise breast cancer awareness AND (more importantly) funds of her mother in-law's treatment.
She's collecting any style as long as they are minimum 4 inches (finished) and contain pink fabrics. Also, square/rectangle is better.
So I decided to make some more blocks. I made one a few months ago (just a simple 2.5 inch patchwork one) but I pawed through my stash and found all the pink I had and realized I needed to make more blocks. I've been trying to bust my stash and this was PERFECT. It was also a perfect chance to try out a simple/basic block I've been wanting to try.
BLOCKS AHOY!!
Log cabin blocks for the WIN.
I made them one round smaller than the instructions I found. But these are around 10 inches in size (didn't measure, but the longest log on them is 10.5 inches so they're in that ballpark).
Those were the first two I made. I did a fussy cut cute print for the centers. I just HAD to use that piggy.
(oh, any wonkiness you see in them is because they're on a lumpy picnic table--the blocks aren't crookedy like that).
Once I made that pair I was kind of hooked. I just had to make a few more.
And since I was cutting fabric, I felt obligated to keep using the fabric, trying to use as much of the cut bits as possible. Then when one print would get low, I'd try to use it all up. It was like a game!
I tried not to duplicate the center square on any of them.
(beware, my toes are in the next pictures! these little piggies were putting the sewing machine pedal to the metal)
I ended up with a total of eight log cabin blocks.
And all kinds of little pieces left over. SO. . .I had to make two more blocks to bring the grand total up to 10.
2.5 inch charms in a nine patch style. Very basic. (again, any warbly/wonkiness is due to the surface they are on, they turned out very neat--except for one seam on each of them. It curled over and I shook my fist at it and put a pox on its home!)
They measure at about 6 inches each? I put my 5 inch square ruler on them to make sure they met the minimum size requirements and they were larger than it so I was all good.
I had so much fun making these. It was nice to do some actual quilt block making for a change.
And I realized I like the smell of hot fabric. When you're ironing (pressing--whatever) some unwashed fabrics and you get that sizing smell? Yeah, I like that a lot.
I mailed these off this morning and I hope they are of some use to Anna. Hell, even if she thinks they suck, I had fun and busted some of my stash so I'm a big winner!
Subscribe to:
Posts (Atom)