Monday, December 8, 2014

GIVEAWAY: Sew Mama Sew Giveaway Week! CLOSED

It's that time of year again.

Sew Mama Sew Giveaway Week.

During SMS giveaway week there are a ton of giveaways from all kinds of folks.  Sewing/crafting supplies and handmade items.  It's great fun.

I've participated before but I think I skipped the one earlier in the year.  So I'm due to round up something FABULOUS to give away.

And what is more fabulous than FABRIC.

Holy crap, yinz are in for a crazy prize this year.

But before I show you pics, I have to make this announcement.

GIVEAWAY IS U.S. ONLY.

I'm giving away a big ass prize here and I can't afford to ship it internationally.


See!  I'm not joking.  That's a big ass priority mail box.  The $12 ish dollar to mail it size and that bad boy is busting out full of fabric.

It's a big fat destash box JUST FOR YOU!

(so that's why I have to keep it to U.S. only. . .I'm not a grinch, I swear. . .ok, I am a grinch but not in this case)

Want a taste of what's in that there big ass box?

Of course you do.


Oh, I can't show you every little thing because, well, I'm lazy as hell and just don't want to.  How's THAT for honesty, huh?

Here's some more honesty for you.

This box is packed with fabric and it's all destash/scrappy items.  That means it's stuff I don't want anymore.  BUT, that doesn't mean it's crap.  I don't keep crap in my stash.  This is all fabric I either got as part of scrap bags, got in swaps, used a bit of and have too much leftovers, or just plain hoarded because hoarding happens and now I'm having hoarder guilt and this is the perfect way to soothe myself.


It's all quilting weight cotton from various sources. There are all sizes, too.  A lot of fat quarters, a bit of yardage, and a bit of truly scrappy sizes.  (I think the smallest bit is about a six inch square, kind of a funky size).  But NO itty bitty pieces or odd ball shaped trimmings.  Remember, I said there was no crap here.

Oh, and there is some truly vintage stuff here, too.


Yes, that tag there proves that red christmas print is truly vintage.  A lot of the christmas fabric (all pictured) is.  I snipped off what I wanted from it and now I just have to be honest with myself and admit I'm never going to use the rest.

(oh, that print on the far right in the christmas pic there is the smallest scrap size)

All of the fabric is in good, unwashed condition.

I can't even begin to guess how many total yards of fabric are in that box because I was too damn lazy to unfold every bit and measure and then add it all up.  Pishaw to all that.  I just went through my stash and grabbed up stuff that I didn't have any love for anymore.

SO. . .what do you have to do to try and win this mass of fabric?

GIVEAWAY IS NOW CLOSED

--------------------------------RULES n'at----------------------------

GIVEAWAY IS NOW CLOSED

1.  ONE entry per comment (and one comment per email address).  Comment below.

2.  U.S. ONLY  (if by some chance you enter and win and aren't U.S., prize will be forfeited and new winner drawn)

3.  MUST include your email address in your comment.  (because I'm lazy and don't want to go hunt down your email address.  You can leave it in a form like this:  emailname at whatever dot com).  No email address and the comment will be deleted.

4.  Giveaway is open until Friday 12/12 at 5 p.m. EST.  Winner will be emailed immediately.  Winner must reply by Monday 12/15 or new winner will be drawn.  Final winner will be announced in a separate blog post as well.  Prize will be mailed promptly (depending on reply of winner with address)

Remember, U.S. only for this one.

GIVEAWAY IS CLOSED.

Made for Swaps: Dotees and a Patch

I'm heading off to the post office in a few minutes so it's time to show off the swaps I'm sending out.

First up is a profile specific dotee as a Christmas gift.  So I was tasked with making a dotee based on my partner's profile and then wrapping it up like a gift and including a Christmas card.  The card was just one I had from a box of cards I got a while back (it takes me a bit to use up a box of cards) and the wrapping on the dotee was fabric and some vintage binding (both Christmas themed).

The dotee:


"YEAAAHHHH!!!  I'M FREAKING CUTE!!"

Why yes, little penguin, yes you are.

And a super simple design.  Just a pear shaped body with revers applique for the belly.  I did have to make this penguin twice.  The first go round the bottom bit (between the reverse applique and the opening to stuff) came apart.  So the second go round I made that area a bit larger and I stitched the reverse applique part down with a zig zag stitch instead of straight.  Problem solved.


Oh, did I mention the body fabric is also penguin print.  I made sure this cute fella was completely visible on the back.


The tail is all gold fish because. . .well, what else would a penguin want but a string of fish?

The penguin is going in the same package with the next item to show off, a patch.

The theme for the patch was your all time favorite song.  We've been doing song themed patches for a bit but this time you could pick any genre/artist.

I couldn't come up with just one song that was my all time favorite.  I have a lot of favorites and then I noticed a lot of my favorites wouldn't lend themselves to easy interpretation as patches (though they would be fun to interpret in art, but for a patch I wanted something I could be a tad bit literal with, just illustrate the lyrics type thing).

I decided I'd go with one of my all time favorite bands, Hole.  Yes, I adore Hole (and Courtney Love).  But, again, a lot of the songs were tricky to get a very literal patch from the lyrics.  But then I remember. . .

My Beautiful Son.


"He had ribbons in his hair and lipstick was everywhere.  You look good in my dress.  You look good in my dress.  My beautiful son."


Isn't he just lovely!

He does indeed have ribbons in his hair and "lipstick" (aka fabric marker in red) everywhere.  The dress might just be his mother's nightie or slip, given how well it fits such a small child (and how lacey it is).  So I took a tiny bit of creative license on that.

You can't see it in the photo, but the dress has pink lace straps (the same lace as the waist belt) and is lace layered over muslin.  It's machine stitched to the patch.  (as are the ribbons)

I also took a bit of creative license in adding the pearls.  I have a mess of this trim and it would be a crying shame not to whip some out for a patch like this.  It does give the whole patch a little more pizzazz.


The back of the patch is the same theme.  I got this fabric in a scrap pack and wondered if I'd ever use it as it was intended (paper dolls).  Guess I answered that question.

I have to say, I LOVE this patch.  It makes me want to make a ton of lyrics inspired patches just for the hell of it.

Last but not least on my mailing list today is another dotee.  This time the theme was kawaii.  Man, do I know kawaii.  Kawaii is my bag, baby, and it freaks me out!


Squeee!!

It's a guinea pig.  I love guinea pigs, especially super cute ones.


Recognize that body shape?  Yup, it's the same one as the penguin.  I had the template laying on the table and it was perfect.  I just had to add the face patches and DONE.

It' might not be that obvious in the pic (damn poorly lit house!) but the face patches are two different shades of brown.  The body is a cream color (not pure white).

Why yes, I did make teeny tiny ears for this cutey.  Scraps for the WIN!


And, yes, the patches go around to the back, too.  I did tack them down with a swipe of glue.  And the eyes are glued on, too.  I didn't have any black seed beads so glue was the way I had to go (mental note, get a tube of matte black seed beads).

What's that there at the bottom?   (hee hee, bottom!)


Tiny tailio!

I'm not really sure if guinea pigs have actual tails.  I know they don't have anything you can really see as a tail but I think they may have a bit of a nubbin that covers their hole so I gave my guinea pig a wee little embroidered tail.  Cute!


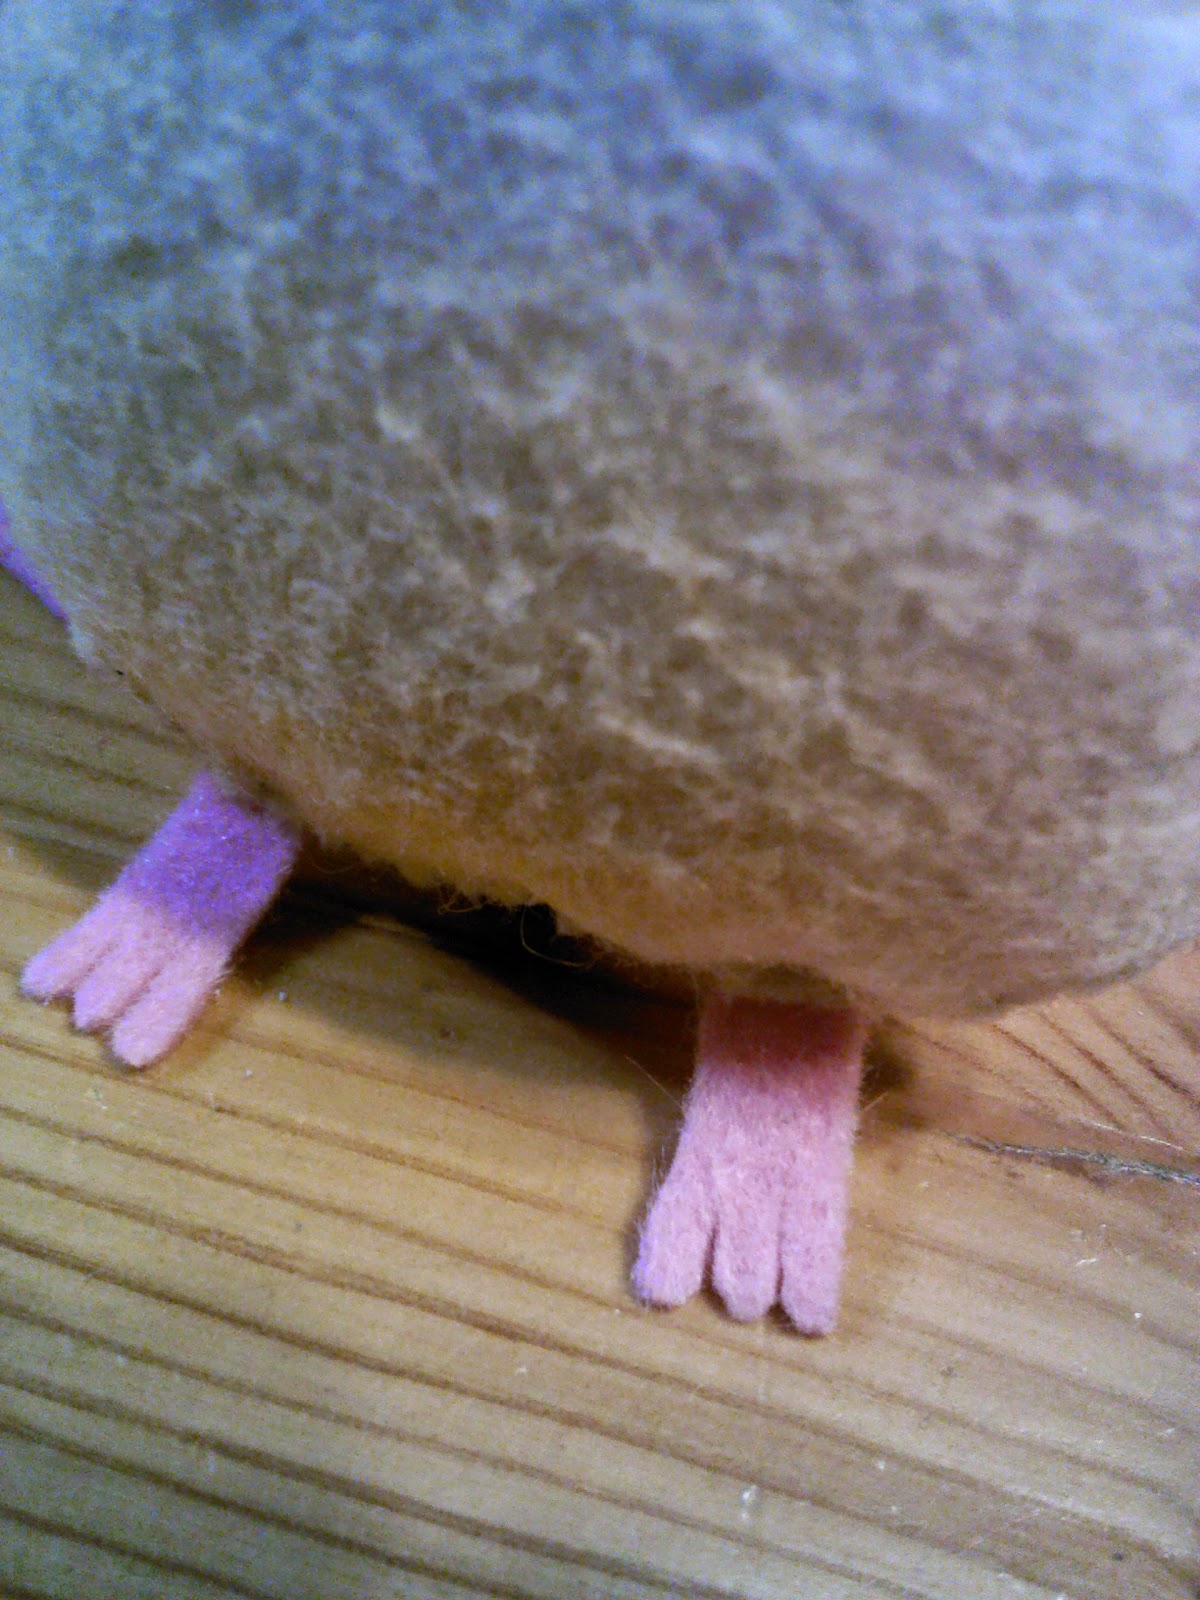
Speaking of cute, check out the tiny toesies.  Super simple, too.  Just snip tiny strips into the end of a larger (wider) strip and then carefully round the "toes" to make them less square.  Again, great scrap buster.

The guinea pig is off to Australia.  I hope he makes it before Christmas but if not, he'll be a cute new years surprise.

What else am I working on for swap?  COOKIES.  Two dozen tiny cookies to be exact.  And another patch and two more dotees.  The cookies are almost done (just have to stitch up the last 11 and then make the plate for them).  And I have the ideas for the dotees all worked up so they'll be fast.  The patch won't be hard, either, once I get my idea.

OH, and I have to do a bit of christmas sewing, too.  I have kicky toys to make for my cat nephews and a shopping bag to make (for my sister to give to someone).  Tick tock!

Wednesday, November 26, 2014

For a swap: Patch

Swaps have been slow lately so I only have this one to show off.

It was for a monthly random patch swap (so no theme).


I just went totally random with it.  I used a 5 inch charm square I got in a recent swap and just added fun embellishments.  I think I just wanted to see if I could use my machine would neatly sew on the trims and it did.  I just set the stitch length a bit smaller than I normally use and that was that.

Then I added some beads and bobbles.


Elephant sequins blowing heart buttons.  CUTE!


Rose beads with seed bead stems.  I have a handful of these beads and haven't had much use for them so this was fun to just add them to add them.


The back.  From my scrap bin.  Keeping with the low volume and linear theme.

I mailed this off to Australia today so I hope it's well received.

What else am I up to?

KITTIES!  I got my Spoonflower fabric a while back and got it all sewed up.  I just need to stuff and close the works.  Maybe I'll take those with me to stitch up while I'm sitting around my parents' house this weekend.  They are so damn cute I could die.

I also have two swaps in the works.  I have the ideas all plotted out I just need to see if I can make them work.  Well, work the way I want them to work.

Then I need to get back to the Briar Rose quilt top and work on my postage stamp quilt top and get to the big flannel whale I want to make.  I've been lazy lately.

Monday, November 10, 2014

For swaps: Dotee and Patch

Swaps are slowing down but I'm still doing a few here and there.  I just mailed this pair out today.

Thanksgiving Dotee


Of course, I made a turkey.  I could have been more creative and made a pilgrim or a slice of pumpkin pie (I was really tempted to do that) OR a turkey dressed as a pilgrim (just thought of that) but I went simple because I had some great fabrics to work with to make a fun turkey.

(I also had the idea to make an alien bursting out of a cooked turkey, a la the Far Side cartoon, but I didn't think that would go over well and it would have taken a bit of time and I was all procrastination-ville on this one)

I also blame having just played with my free motion quilting foot so I was in a quilting mood, so I wanted to make a quilted turkey tail.


Crazy eye turkey for the WIN!  And ric rac wattle.

See how cute those fabrics are.  The small print leaves were perfect for the body and the tail. .


Hee hee, it's all FOOD, including a cooked turkey.  OH YEAH!

I'm also quite pleased with the three strand beaded and sequin tails all in fall/t-giving themes.  There's a leave, a cornucopia, and a turkey, thank you very much.

Next up is an ornament patch.

I'm really tempted to not show it off until my partner gets it but I know I'll forget to show it off if I don't stick with my ritual of showing off right after I go to the post office so. . .swap partner, stop reading NOW if you don't want to be spoiled.


How effing cute is that?

Granted, minions are so damn cute you could spit but they're even cuter when you make them with a google eye (even if it is a glue on google eye).

I did use a good amount of glue on this patch but I also stitched so it's not just glue.  I know, there's nothing WRONG with glue but I just feel so lazy if I only use glue.  It wasn't hot glue, so at least I didn't lose any flesh to this patch (I'm inept at hot glue, I leave so many damn strings, which I hate).


Silly minion, all wrapped up in the lights!

My sister gave me the idea.  I knew I wanted to make a minion (because my partner likes them and so do I, and BONUS they're easy to make what with being such a simple shape) and we were yapping about it while wandering the craft store.  I was looking for miniature stuff to use for the patch, maybe little candy canes or some such and we spied these mini lights and that was that.

My only regret?  I didn't get lights that actually light.  But I bet those would have been a bit too large for this patch.  As it is, this patch is on the larger size (but not huge).


So, the minion is all felt, layered on itself to make the outfit, hands, and feet.  I glued everything together to kind of baste it then did a round of stitching for good measure (except on the band, where I made sure it wrapped around nice and far and glued the back as well).  Added a few extra stitches for the hip pockets and a few beads for the strap hooks.  The chest pocket is open on the top and you could put something super small in there.  Maybe and inky dinky candy cane?

The lights are wrapped totally around the felt minion.  It was just easier that way and it gave him a little lumpy texture.  As I stitched him down, I caught the light string with stitches where appropriate.
The lights then go up and out the top of the patch (via a small slit) and then back down to make the hanger.  I added a swipe of glue to each slit to reduce fraying.


The backing fabric.  I love that fabric, it's so cute. I had to make sure the Merry Christmas window showed.

In a rare move, I used quilting batting for the filling.  Normally I use cheap-o felt but I didn't have any light enough that it wouldn't show through the front fabric (which is a cream color with light white snowflake print) so I dipped into my batting scraps and there was a piece big enough.

I'm loving this patch so much and really hope my partner gets a kick out of it.  I love making stuff for her because she's a great partner, always making equally great stuff.

This swap also had a wrapped gift to go with it (a kit to make a patch) but I won't disclose what it contained.  It can remain a surprise.

I have this same partner for the next swap I'm working on and I'm cooking up something equally as fun (but NOT a minion, that's the only clue I'll give--I've made her a few minions now so I need to do something different).

That's the only swap I still have to do, so I think I'm going to do some quilting practice.  I want to work on my postage stamp quilt top and I just found this other fun quilt block I want to try and I need to finish up the Briar Rose top (just need to sew the blocks together for it, but I need to get off my lazy bum and go up to my third floor to lay the pieces out on the bed to get them all arranged so I can then stitch them up).

OH, I also have an order from Spoonflower on the horizon.  It's cut and sew kitties (one set for me, one for the Fluff Project) so I'll get them stitched up once they arrive (that won't be for a few weeks).

Monday, October 27, 2014

Happy mail for a friend

So, in case you weren't aware, I'm lazy.  Like REALLY lazy.

My bestest friend had a second child about two years ago (I think that's accurate--I'm bad with little kid ages) and I never made her a "welcome to the world" gift.  See, it's easy with the first kid because it's a big ole deal.  First baby and baby shower and the whole works.  For the second kid, well, I'm lazy so I just plain out forgot.

But I have remedied that situation.  This weekend I finished a happy mail gift for not only the younger child but the older child, too.  I don't have kids but I do remember being one and it always chapped when a sibling got a random gift and you didn't so I made a small item for each of them (as a kind of Halloween treat) so the older child doesn't get miffed that little sister gets a random gift out of the blue.

Blah blah, PICTURES or it didn't happen!

First, credit where credit is due.  I made the monkey doll from a free pattern I got HERE.  I've had the pattern FOREVER but just didn't have a reason to make it.  I thought about making it for the Fluff Project but it seemed too fussy for that.  Really, it's not.  I've made fussier things for the Fluff Project.  I also worried it would take too much fabric but it's not a fabric hog, either.  Especially if you don't use directional prints.  Using corduroy for the body does mean you have to keep the wale going the right way but that's not a big deal, either.  And as for fussy details, the face isn't any fussier than the damn guinea pigs I made for the Fluff Project.  The only down side I can find to making these for the Fluff Project is they're kind of large.  So mailing them would be bothersome.  But making a few to add to a big box of stuff wouldn't be a big deal.


How damn cute is this monkey?  Yes, that damn cute!

I had to make a monkey.  See, I made a sock monkey for the older child but I just didn't feel like making a sock monkey.  I love them and all but making them can be dull.  I needed to try this pattern out since I've had it forever.


Cheeky monkey is cheeky!  It's a bit of hand stitching but not that bad at all.  I thought the ears would be super fussy but they were really simple and turned out better than I thought they would.


The body is cotton.  Sock monkey print for the win.  It really worked so well.

If you checked out the pattern link you'll see that my laziness did rear its ugly head.  I didn't make the skirt, hat, and shoes.  I really didn't want this monkey to be a lot fancier than the sock monkey I made for the older child.  If memory serves, that monkey might have had a diaper and that's it.  If it was dressed, it was probably wearing actual baby clothes which I assume would have been used on the baby (but what do I know).


This monkey does have the socks.  The other pics don't show the color well.  It's light blue with white bubble looking dots.  I had it in my scraps.  So this pattern can be a scrap buster, too.

Ok, I have to review the pattern a bit now.  Overall it's an easy pattern BUT. . .there is one issue I have with it.

The tail.  Specifically, how you attach the tail to the body.  They have you stuff the tail then attach it which is a dumb way to do it.  Especially considering the arms and legs are attached un-stuffed.  The pattern has you attach all limbs before you sew the front and back together, so you get a nice smooth attachment, which is good.  But getting the tail onto the back was a pain in the ass (hah! pun intended).  It would have been a ton easier to attach an unstuffed tail to the back seam and then stuff it after you turn the body right side out.  No different than how the limbs are done.  I'm making a note of that for future uses.

The pattern also wants you to put the face and ear details on after you assemble the doll (but has a note you can do it before) which I think is backwards, too.  Attaching before you assemble makes it easier in general.  You just have to be a little careful to get the pieces properly centered so you don't end up with a crooked face.  I just find it easier to embroider on a flat surface then trying to embroidery on a rounded (stuffed) surface.  I always get nicer result embroidery on a flat surface.

So, that's the monkey.

Next. . .


EEEEEE!!!!

So g-darn cute I wanted to keep them for myself.  No joke.

Mice finger puppets!


Yes, one is a little bit bigger but not as bad as this picture makes it look.  They are a little big for a child's finger but a child should be able to put two fingers in them to make up for the extra room.  I just couldn't make them any smaller since the faux fur I was using was super plush.

These finger puppets brought back crazy happy memories for me, too.  I had a white mouse finger puppet as a kid.  I got it from a school craft fair and I loved that thing nearly to death.  It had a faux fur tail (unlike mine with bright pink ribbon tails) but I was afraid the fur would just fall apart if I cut a small strip of it and that would just be sad.  The ears are felt and the eyes are tiny pom poms all lovingly STITCHED to the puppets.  NO GLUE HERE!  (though you could probably glue the eyes on without issue--the ears not as much since you need to get that curl and you need to stitch them to get that).

I debated putting noses and whiskers on them but I decided not to.  Adding noses would be easy if the kiddos wanted it.  Just a few stitches of embroidery floss and bob's your uncle.  Whiskers would be easy, too.  Just knot off some embroidery floss (leaving a decent tail after the knot) and, viola, whiskers.  Or if you wanted to get super fancy, use filament thread to get a more stiff, whiskery look.  But filament thread is a pain in the butt to work with, even if it does make for nice hidden stitches (I love it and I hate it all a the same time).

I hope the kidlets like the swag.  I had a blast making it all.  Especially the finger puppets.  (no pattern for them, it was just a rectangle of fabric and then I stitched a curve over one open end and then straight down the bottom and left the other end open--super simple but my machine was hating on me for wedging all that fake fur into it--I seriously thought it might not fit under the presser foot!).

Shhh, we're sleeping!

Time for a small cat break.

Sunday, this is what the whole family was doing.


Good thing we have a big couch.  It can hold both cats, me, and the hubby.  Perfect for lazy Sundays.

You think I'm exaggerating?  Really, we slept all day.  It was just like being a cat and it was wonderful.

And cats are so much easier to photograph when they're sleeping.


Could Eugene *be* any more precious in this pic?  Actually, he did get even cuter when he covered his face with his paw but the pic of that just looked like a fuzzy gray ball.  You couldn't see his face at all and it was hard to tell what exactly you were looking at.


Sleepy Murry.

This might be the first pics of Murry I've shared here.  Our sweet girl, Olive, died about a month ago and it really hit the whole family hard.  Eugene the most.  He loved Ollie like no other and being an only cat wasn't working for him.  It also wasn't working for us so well.  We are a two cat household and being a cat low left us feeling empty.  Enter Murry.

He's about 11 months old now (so still a youngster) and we're just starting to see his personality emerging.  He's sweet and cuddly and has enough energy to race around the house with Eugene (and wrestle--they love wrestling).  When we went looking for second cat, we were looking first and foremost with Eugene's needs in mind and I think we did well on that front.  It's a bonus that Murry is more of a lap cat than Eugene.  We do enjoy lap cats around these parts.


Even if the "lap" is the side of your neck.  Murry does enjoy sleeping near your head.  He gets into bed with us and wakes me by nipping my ears and grabbing in my hair.  As long as he doesn't fart, I can live with it (and he does fart, he's a total stink bag).

As for Olive, we picked up her ashes this weekend so she'll be able to celebrate Dios de los Muertos with us this year.  I got the urn I really wanted for her and it's so perfect for her, it makes me smile every time I see it.  I wish she was still with us, but if she has to be gone at least her urn does her crazy personality justice.  I'll make a post about the ofrenda once I get it all finished.  I have a few more things to get organized before Saturday.


Friday, October 24, 2014

For a swap: Dios de los Muertos Ninni monster

First up, a link to the free tutorial and pattern used:  Ninni monster.

For the swap, we used that tutorial and made whatever type of ninni we wanted (you could even play with the size but the regular size is easy to work with).

I decided to go with the regular size but I hemmed and hawed on the design for a bit.  First I was thinking I'd do a hipster ninni, with corduroy pants and big geeky glasses (maybe even a beard) but then I was looking over my swap partner's profile (I really wanted this to be good, since I swap with this partner a lot and she always makes great stuff so I have to bring my A game with her) and BOOM. . .sugar skull design.  So timely and a little easier to do than the hipster.


How damn cute is this little monster?  I was THRILLED at how well it turned out, too.

I was confident the design would work (it's just simple embroidery).


Felt details for the eyes and nose with embroidery around it.  All basic running stitch with some french knots for a little pizzazz.  (the felt details are sewn on, too.  I was worried glue would make it too crispy)


I was worried the heart wouldn't turn out right since I just did a random free hand design (for both the felt heart and the flames).  At first the red looked bad to me, but then I looked at it for a while and low and behold it kind of looks like a wee crown.  I totally didn't plan it that way but I'm happy it turned out like that.

I totally cheat when I embroider, too.  Especially on felt.  I draw the design in ballpoint pen (light) on the back so I have a basic guideline to follow.  Sometimes I deviate from it a bit (the mouth in particular didn't follow the pen marks exactly at all) but it keeps me from going too crooked or wonky when I'm stitching.

I kept the design really basic.  I didn't want to overwhelm the little monster.  If I had been feeling more brave, I would have added some petal type shapes at the hands and feet and maybe a little bit of scrolling down from the arms and along the edge of the body.  But I was kind of worried about the seam allowance (it's built into the template you use) and I was sewing felt to cotton so I opted to not embroider right up onto the edges.


This is the back.

How much do I love that fabric?  I've been hoarding it for (no joke) YEARS.  I got a remnant of it back when I thought I was going to make myself a Mimi Kirchner tattooed man/woman (she gives the pattern for a mini sized one in a book I have) but I never got around to it.  I knew I wanted to use skeleton/day of the dead themed fabric on the back and I have a bit to pick from and I had pretty much forgotten about this until I got poking through my DotD/halloween fabrics.  That image is the perfect size for the back, too.  It was meant to be!

I was worried that the seams would be too bulky when I turned out those little ears and hands, so I used a smallish seam allowance.  I don't remember what the allowance was on the original but I'm going to guess mine was about 1/8"?  I just set my needle as far to the right as possible and then used the edge of the regular presser foot as a guide.  I know at the regular (middle) needle setting, the presser foot edge is a tiny bit more than 1/4" so. . .It was perfect.  I didn't have any issues with getting too close to the edge and risking a blow out.  I did have to pick the ear seams out a bit with a thick needle when I turned them (just to make sure I really go it fully turned) but that wasn't a big deal.  If I was going to make this all in felt (and turn it) then I'd add a bit for a bigger seam allowance.  For all cotton, I'd just go with 1/4 inch.

I love the design of this little monster, too.  You can do a TON with it.  And it has a bit of a cat look to it which made me tempted to make a second one to add to the ofrenda I set up for my cats.  But I'm just about done with the special item I made for it this year and I'm thinking I need to make a mat for it, too, so maybe I'll do a ninni sugar cat for next year.

I just mailed this off today so it should arrive by Monday.  I can't wait for my partner to get it.  I really think she'll like it a lot.